Understanding the Gold Birthday Cake Concept
What is a Gold Birthday Cake?
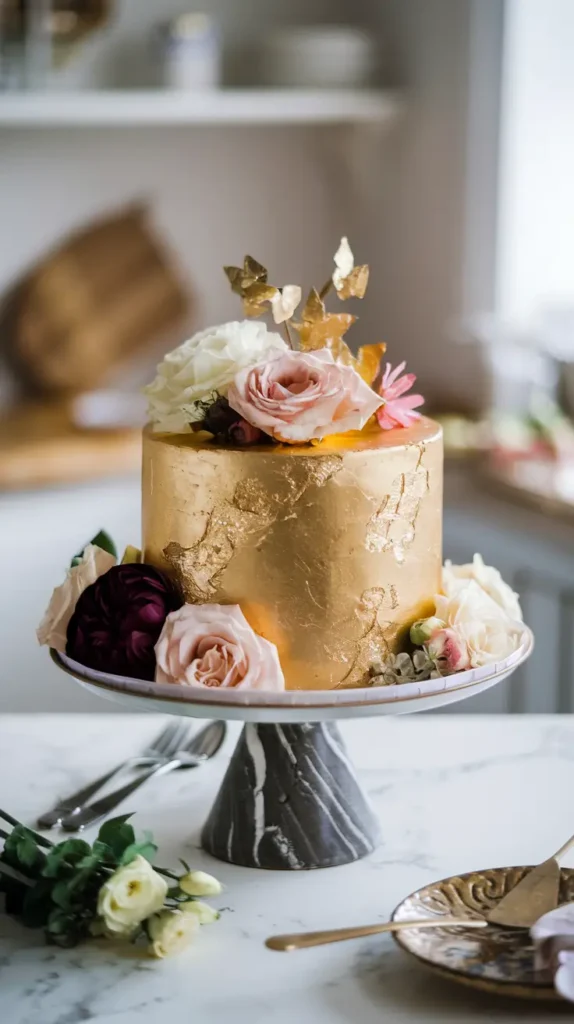
A Gold Birthday Cake is a stunning centerpiece for any celebration, characterized by its rich, golden hue and luxurious appearance.
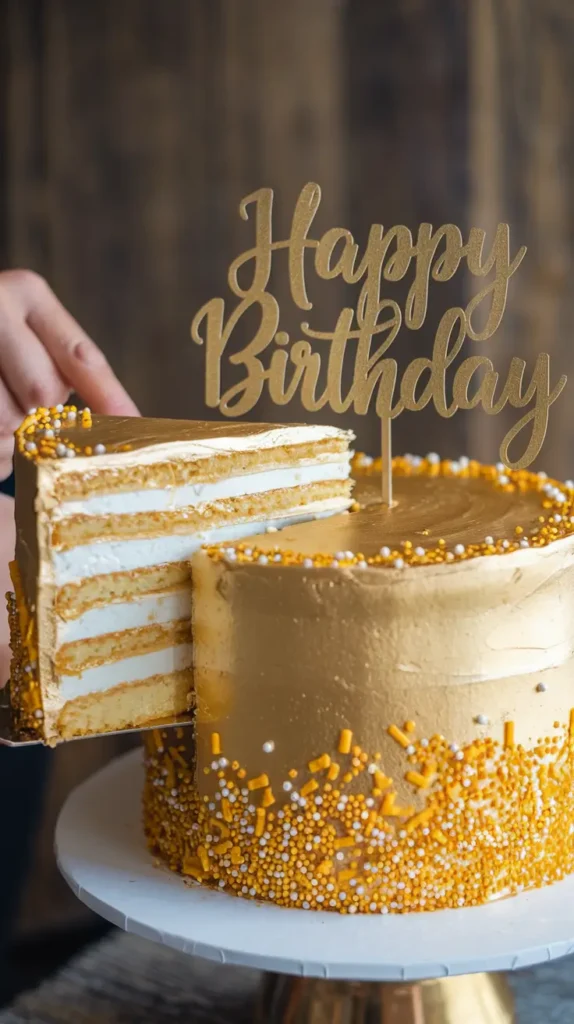
This type of cake often features layers of moist sponge or rich chocolate, enhanced with a beautiful gold frosting that can include edible gold leaf or food coloring to achieve that perfect metallic finish. The allure of a gold cake not only captures the eye but also adds a touch of elegance to birthday festivities.But why gold? Let’s be honest, gold is synonymous with luxury and celebration.
When you whip up a cake like this, you’re not just feeding people; you’re creating an experience. It’s a cake that says, “This day is special—let’s celebrate in style!”
Why Choose Gold for Birthday Celebrations?
Choosing a Gold Birthday Cake makes a statement at any gathering. Gold is often associated with wealth, prosperity, and celebration, making it an ideal choice for marking special occasions. The shimmer and shine of a gold-themed cake can elevate the birthday experience, delighting guests with its unique design and flavor profile. Whether it’s a milestone birthday or a simple gathering, the introduction of a gold cake can transform your party into an unforgettable event.
Essential Ingredients for a Gold Birthday Cake
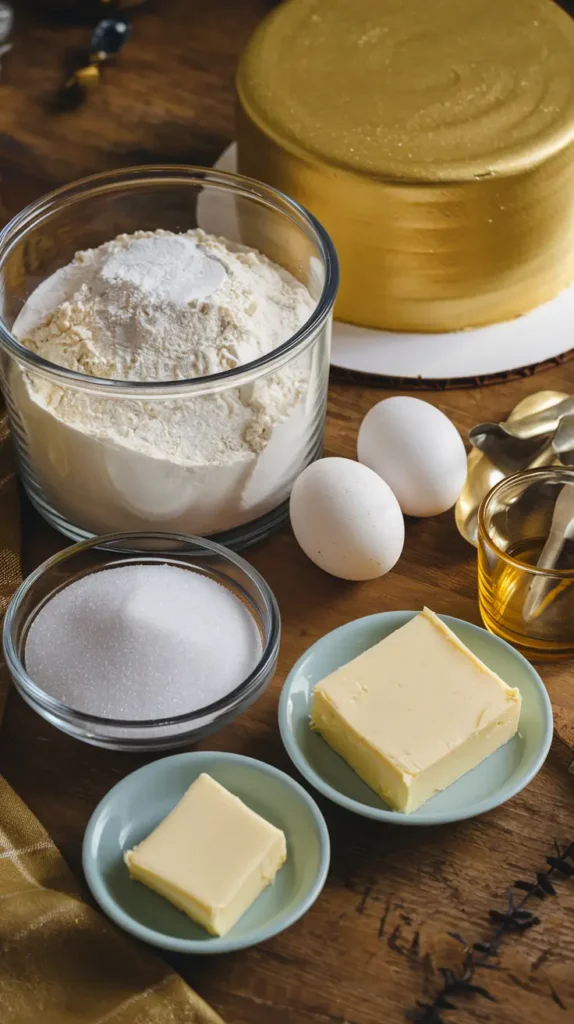
Now, let’s talk ingredients. To create a scrumptious Gold Birthday Cake, you’ll need the basics—flour, sugar, eggs, and butter are your best friends in this endeavor. But here’s where you can get creative:
- Gold food coloring: This is key to achieving that rich golden color in your batter and frosting.
- Edible gold leaf: For that luxe finish, a sprinkle of gold leaf on top of your cake will have everyone asking, “How did you do that?”
- Flavorings: Don’t be shy! Classic vanilla or rich chocolate are always crowd-pleasers, but you could also explore unique flavors like lemon or almond for a delightful twist.
Key Baking Tools and Equipment
To successfully bake a Gold Birthday Cake, having the right tools is essential. You’ll need essential baking equipment, including mixing bowls, measuring cups, and cake pans. Don’t forget decorative tools like piping bags and cake spatulas, which will help in applying the gold frosting beautifully. Investing in quality tools will make the baking process smoother and improve the final presentation of your cake.
Common Baking Mistakes to Avoid
When baking a Gold Birthday Cake, it’s important to be aware of common pitfalls. Here are some salient features to bear in mind:
- Dense cake results from overmixing the batter. Mix just until combined!
- Incorrect oven temperature: Always preheat your oven properly—trust me; your cake will thank you.
- Not greasing your pans: A well-greased pan is the difference between a perfectly baked cake and a crumbled mess.
Step-by-Step Guide to Baking a Gold Birthday Cake
Preparing the Cake Batter
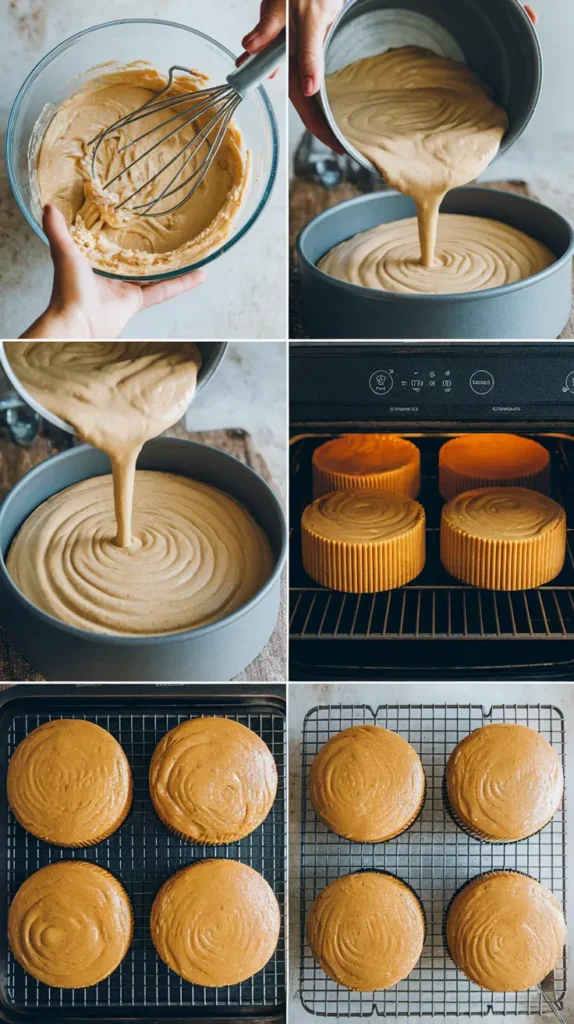
Alright, let’s get started! The first step in creating your Gold Birthday Cake is preparing the batter. Here’s what you’ll need:Ingredients:
- 2 cups of all-purpose flour
- 1 ½ cups of granulated sugar
- ½ cup of unsalted butter (softened)
- 1 cup of milk
- 3 large eggs
- 2 teaspoons of baking powder
- 1 teaspoon of vanilla extract
- Gold food coloring (the secret to your cake’s gold shimmer)
- Mixing the Dry Ingredients: In a large mixing bowl, whisk together the flour, baking powder, and a pinch of salt (this helps enhance the flavor). Set this mixture aside for now.
- Creaming the Butter and Sugar: In another bowl, beat the softened butter and sugar together until it’s light and fluffy. This usually takes about 3-4 minutes. It’s a bit like whipping up a cloud of sweetness!
- Adding the Eggs and Vanilla: Crack in the eggs one at a time, mixing well after each addition. Follow this with the vanilla extract—trust me, your cake will thank you!
- Combining Everything: Gradually add the dry ingredients to the wet mixture, alternating with the milk. Be careful not to overmix; just stir until everything is combined. Now’s the time to add a few drops of gold food coloring—this will give your batter that gorgeous golden hue.
- Ready to Bake: Divide the batter evenly between two greased 9-inch round cake pans. Give them a gentle shake to level the batter.
Baking the Cake
Now that your batter is ready, it’s time to bake! Here are some tips to ensure your Gold Birthday Cake turns out perfectly:
- Preheat Your Oven: Turn your oven to 350°F (approximately 175°C). This step is crucial—don’t skip it!
- Bake: Pop those pans in the oven and bake for about 25-30 minutes. The cake is done when you can insert a toothpick into the center, and it comes out clean.
- Cool Down: Once baked, take the cakes out and let them cool in the pans for about 10 minutes. Then, gently remove them from the pans and place them on a wire rack to cool completely. Don’t rush this step; a cooled cake is easier to frost!
Cooling and Leveling the Cake
Now that your cakes are cool, let’s make sure they’re ready for frosting:
- Leveling the Tops: If your cakes have domed tops, use a serrated knife to carefully slice them flat. This ensures your layers stack nicely and don’t wobble like a wonky building.
- Storage Tips: If you’re baking ahead of time, wrap your cooled cakes tightly in plastic wrap and store them in the fridge for up to two days. This helps retain moisture.
Making Gold Frosting
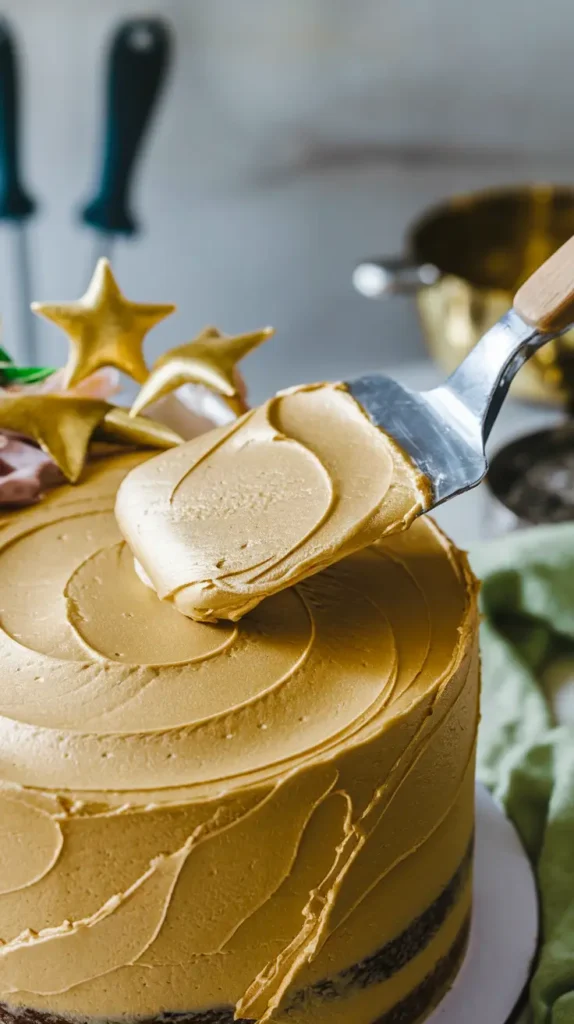
Let’s talk frosting, shall we? A Gold Birthday Cake isn’t complete without a stunning layer of gold frosting. Here’s a simple buttercream recipe:Ingredients:
- 1 cup of unsalted butter (softened)
- 4 cups of powdered sugar
- 1 teaspoon of vanilla extract
- 2-4 tablespoons of milk
- Gold food coloring (for that luxurious touch)
- Creaming the Butter: In a mixing bowl, beat the softened butter until creamy and smooth. This only takes a minute or two.
- Adding Sugar and Flavor: Gradually mix in the powdered sugar. It’s best to do this in batches to avoid a sugary cloud! Once incorporated, add the vanilla and 2 tablespoons of milk.
- Achieving the Right Consistency: If the frosting is too thick, add more milk, one tablespoon at a time, until you reach your desired consistency.
- Coloring the Frosting: Now for the fun part! Add gold food coloring until you achieve your preferred shade.
Assembling the Gold Birthday Cake
Now comes the exciting part: putting everything together!
- Layering the Cake: Place one cake layer on a serving plate or cake stand. Spread a generous amount of frosting on top. Place the second layer on top, and repeat.
- Frosting the Sides: Use your offset spatula to frost the sides of the cake, smoothing it out for that professional touch.
- Decorating with Gold: Finally, add some edible gold leaf accents or gold dust to really make your cake pop. You can also add sprinkles or fresh flowers for an extra wow factor.
Creative Decorating Ideas for Your Gold Birthday Cake
So you’ve baked your Gold Birthday Cake, and it’s time to take it to the next level with some amazing decorations! A well-decorated cake not only looks fabulous, but it also makes your birthday celebration truly memorable. Let’s dive into some stylish and trendy decorating ideas that will make your cake the talk of the party!
Unique Gold Cake Designs
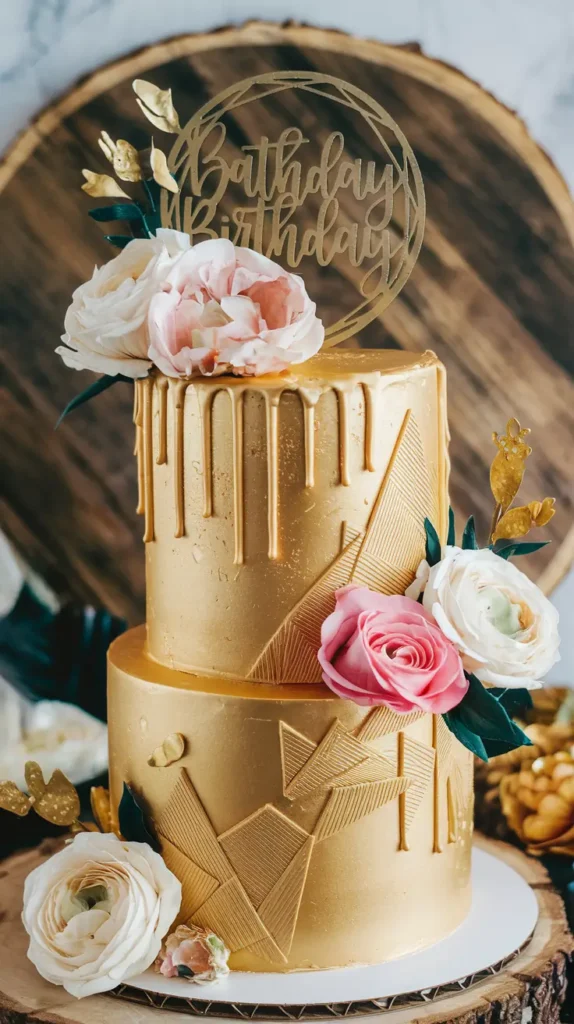
When it comes to gold cake designs, think outside the box! Here are a few ideas to inspire your creativity:
- Geometric Patterns: Use a spatula to create sharp edges and angles on your gold frosting. This modern look can be enhanced with gold sprinkles to mimic a stunning city skyline.
- Floral Accents: Fresh flowers always add a touch of elegance. Consider using edible flowers like pansies or roses, which look beautiful against the shiny gold frosting.
- Naked Cake Style: If you want a more rustic feel, try a naked cake look. Frost only the top and let the sides be exposed, showcasing those glorious layers. Add a dusting of powdered sugar and some fresh berries for a pop of color.
- Drip Cake Technique: Create a dripping effect using a glossy gold sauce made from melted chocolate mixed with gold food coloring. It’s dramatic and absolutely gorgeous!
- Personalized Cake Toppers: Nothing says “happy birthday” quite like a personalized cake topper. You can easily find custom-made options online or at your local craft store that reflect the birthday person’s personality or interests.
Incorporating Other Colors
While gold is fabulous on its own, adding complementary colors can really make your Gold Birthday Cake pop! Here are some combinations to consider:
- White and Gold: The timeless classic—white frosting with gold accents brings a clean, elegant look.
- Black and Gold: This combination screams sophistication! Black fondant or chocolate ganache paired with gold decorations can create a very chic vibe.
- Pastel Colors: Soft pinks, blues, or lavenders look fantastic with gold. Think of delicate pastel flowers or ribbons wrapped around the cake.
- Nature-Inspired: If you love a more organic aesthetic, consider earthy tones like deep greens or browns to contrast with the gold. Fresh herbs, like mint or rosemary, can also add a great touch.
Unique Serving Ideas
Now that your cake is beautifully decorated, how are you going to serve it? Here are some fun serving ideas to elevate the experience:
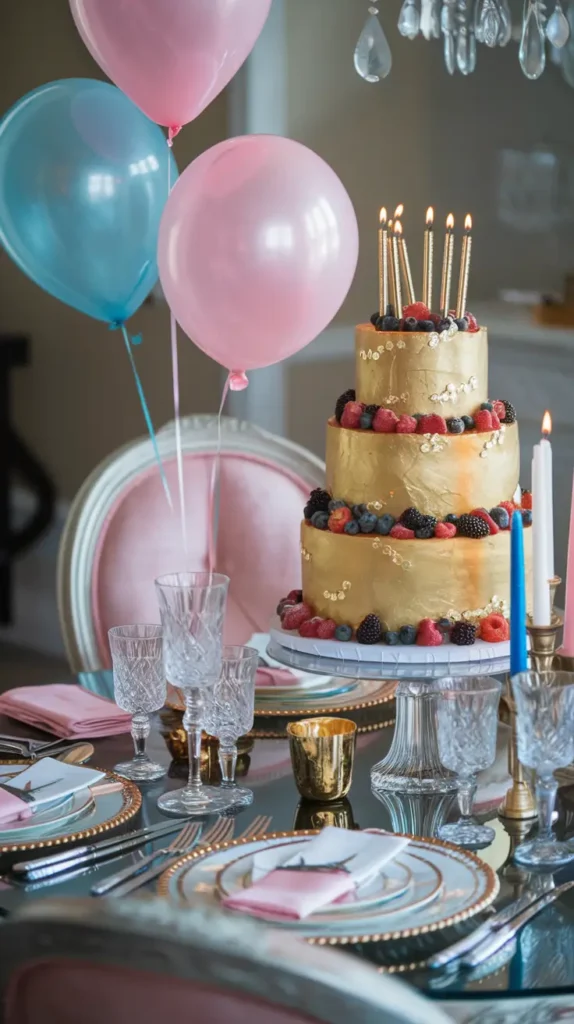
- Cake Plating: Use a beautiful cake stand to showcase your Gold Birthday Cake. Add a few gold-themed decorations around the base, like candles or confetti, to enhance the presentation.
- Pairing Desserts: Consider serving your cake with a side of vanilla ice cream, fresh whipped cream, or even a fruit compote. These complementary flavors will enhance the taste and create a delightful dessert spread.
Photography Tips for Your Gold Cake
Let’s face it—no one can resist snapping a picture of a gorgeous cake! Here are some tips to make sure your Gold Birthday Cake shines in photos:
- Natural Lighting: Always aim for natural light when taking photos. It brings out the colors beautifully and avoids harsh shadows.
- Angles Matter: Experiment with various angles. A shot from above can capture the full beauty of your decorations, while a close-up can highlight the texture of the frosting.
- Backdrop Choices: A simple, clean backdrop works best. A white tablecloth or wooden surface can make your cake stand out.
- Props: Use props like beautiful plates, forks, and napkins that match the theme of your cake. It adds visual interest to your shots.
Storing Leftover Cake
If you somehow have leftover cake (doubtful, but it can happen!), here’s how to store it to keep it fresh:
- In the Fridge: Wrap the cake tightly in plastic wrap or place it in an airtight container. It should stay delicious for up to 3 days.
- Freezing: If you want to save some for later, slice the cake, wrap individual pieces in plastic wrap, and store them in a freezer bag. It can last for up to 3 months!
Frequently Asked Questions About Gold Birthday Cakes
When it comes to baking a Gold Birthday Cake, you might have a few questions rattling around in your mind. No worries! I’ve gathered some common queries and answered them for you. Let’s dive in!
Can I Make a Gold Birthday Cake in Advance?
Absolutely! In fact, making your Gold Birthday Cake a day or even two ahead of time can actually enhance its flavor. Here’s how to do it:
- Bake and Cool: Follow the baking steps as usual, then let your cake cool completely.
- Wrap It Up: Once cooled, wrap the cake tightly in plastic wrap to keep it fresh.
- Store in the Fridge: You can refrigerate it for a day or two. Just remember to frost it on the day of serving for the best presentation!
Are There Alternatives to Edible Gold?
If you’re worried about using edible gold, there are definitely alternatives! Here are some ideas:
- Gold Luster Dust: This is a popular choice and can be brushed onto frosting for a shimmering effect without the cost of edible gold.
- Metallic Food Sprays: You can find gold or bronze sprays that add a shiny finish.
- Colored Chocolate: Chocolate melts can be dyed with gold coloring and drizzled over your cake for a lovely effect.
How Can I Make My Cake Gluten-Free?
Want to whip up a gluten-free Gold Birthday Cake? You can easily swap out some ingredients:
- Use Gluten-Free Flour: There are many blends available that work well in cakes. Just make sure it’s a 1:1 blend for the best results.
- Check Other Ingredients: Ensure your baking powder and other add-ins are also gluten-free.
- Follow the Same Recipe: You can follow the same baking steps; just substitute the flour, and voilà—you’ve got a gluten-free cake!
Can I Use a Box Cake Mix for a Gold Cake?
Of course! Using a box cake mix can save time, and no one will judge you for it. Here are some quick tips:
- Enhance the Flavor: Add a teaspoon of vanilla extract and an extra egg to elevate the taste.
- Add Gold Food Coloring: Just mix some gold food coloring into the batter before baking to achieve that stunning color.
- Frost with Gold Buttercream: Use the same frosting recipe we discussed earlier to coat your cake beautifully, turning that box mix into a showstopper!
What Are Some Popular Flavor Combinations for Gold Cakes?
The beauty of a Gold Birthday Cake is that it pairs well with so many flavors! Here are some crowd favorites:
- Chocolate and Gold: You can never go wrong with the rich taste of chocolate against a backdrop of gold frosting.
- Vanilla with Lemon: A refreshing lemon filling can add a zing to a classic vanilla cake.
- Carrot Cake: The spices in carrot cake create a lovely contrast with the sweet gold frosting.
- Almond Joy: Almond-flavored cake with chocolate ganache and gold elements is simply divine!
Final Thoughts on Your Gold Birthday Cake Journey
Well, there you have it! You’re now armed with everything you need to bake a stunning Gold Birthday Cake that’s sure to impress everyone at your next celebration. Let’s quickly recap the key steps and ideas to keep in mind as you embark on this delicious adventure.
Key Takeaways
- Master Your Batter: Whether you opt for a classic vanilla or a rich chocolate flavor, don’t forget that a good batter is the foundation of any great cake. Add a touch of gold food coloring to make it shine!
- Baking Tips: Preheat that oven, and keep an eye on your cakes as they bake. Remember the toothpick test—there’s nothing worse than a gooey interior!
- Frosting Fun: Gold buttercream frosting is where the magic happens. Get creative! Use techniques to create that luxurious finish with edible gold accents.
- Decorate with Style: Remember, presentation is everything. Consider fun designs, color combinations, and even unique serving styles to make your cake the star of the show.
- Be Resourceful: If you’re short on time or resources, don’t stress! You can definitely use a box mix and still achieve stunning results with a few tweaks.
Your Next Step
Now that you have the know-how, it’s time to roll up your sleeves, gather your ingredients, and start baking! Treat this process as an opportunity to express your creativity. If things don’t go perfectly the first time, remember that practice makes perfect—and every great baker has had a few kitchen mishaps!
A Personal Touch
As someone who loves to bake, I can tell you that my most cherished memories often revolve around the kitchen. The laughter, the mishaps, and, of course, the sweet rewards of a freshly baked cake all contribute to something truly special. Baking isn’t just about the final product; it’s about the experience and the joy you share with others.So, whether you’re whipping up a Gold Birthday Cake for a friend, family member, or just as a treat for yourself, enjoy every moment of the process. Share your creations on social media, inspire others, and most importantly, savor each bite! Thank you for joining me on this cake-baking journey. If you have any questions or want to share your own baking stories, feel free to leave a comment. Happy baking! Let me know if you need anything else!
