
If you’ve ever found yourself scratching your head wondering how to make the perfect February birthday cakes, you’re not alone. February isn’t just a month of love (hello, Valentine’s Day!)—it’s also the last hurrah of winter, and birthdays in this cozy, chilly season deserve a cake that feels just as special. So, grab your apron, because we’re diving into a cake journey filled with seasonal inspiration, simple steps, and just enough flair to impress everyone at the party.
Why February Birthday Cakes Are Unique
Let’s start with the basics: what makes February cakes different? Well, it’s all about the vibes. February is a month brimming with romance, winter coziness, and bursts of bold colors like red, pink, and purple. Whether you’re baking for someone who’s all about zodiac signs (Aquarius or Pisces, anyone?) or simply want a cake that screams “February,” the possibilities are endless.
Here’s the secret: A February birthday cake isn’t just a dessert—it’s a reflection of the season, the person, and a dash of creativity. Think about flavors that warm the heart, decorations that capture the spirit of the month, and personal touches that make the cake unforgettable.
Step 1: Choose the Perfect Cake Theme
Before you even crack an egg, you’ve got to nail down the theme. Here are some ideas that scream “February”:
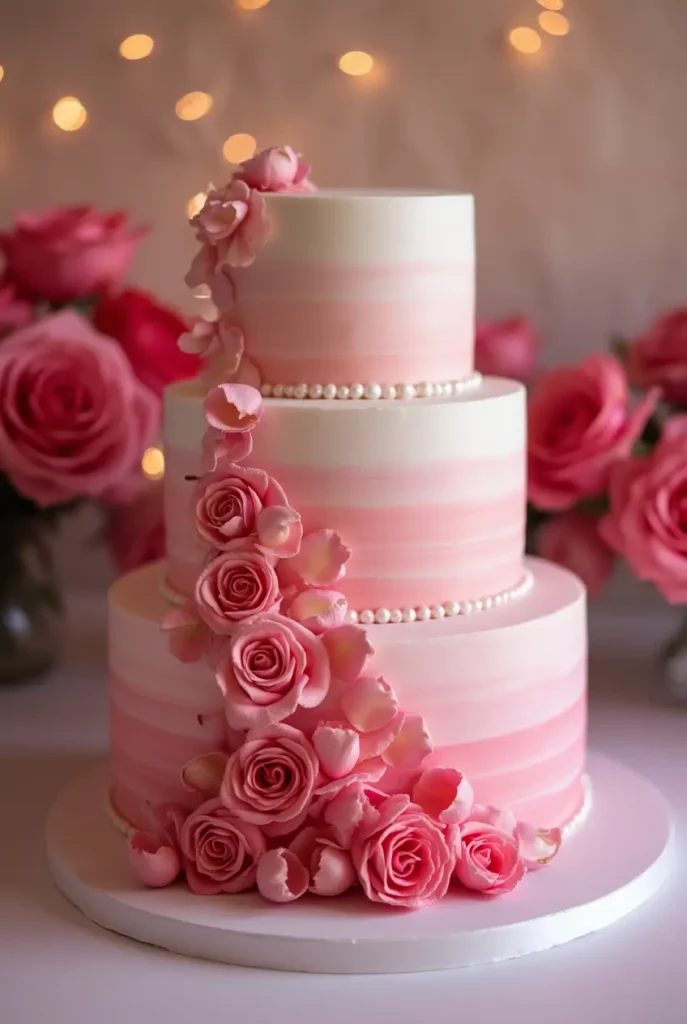
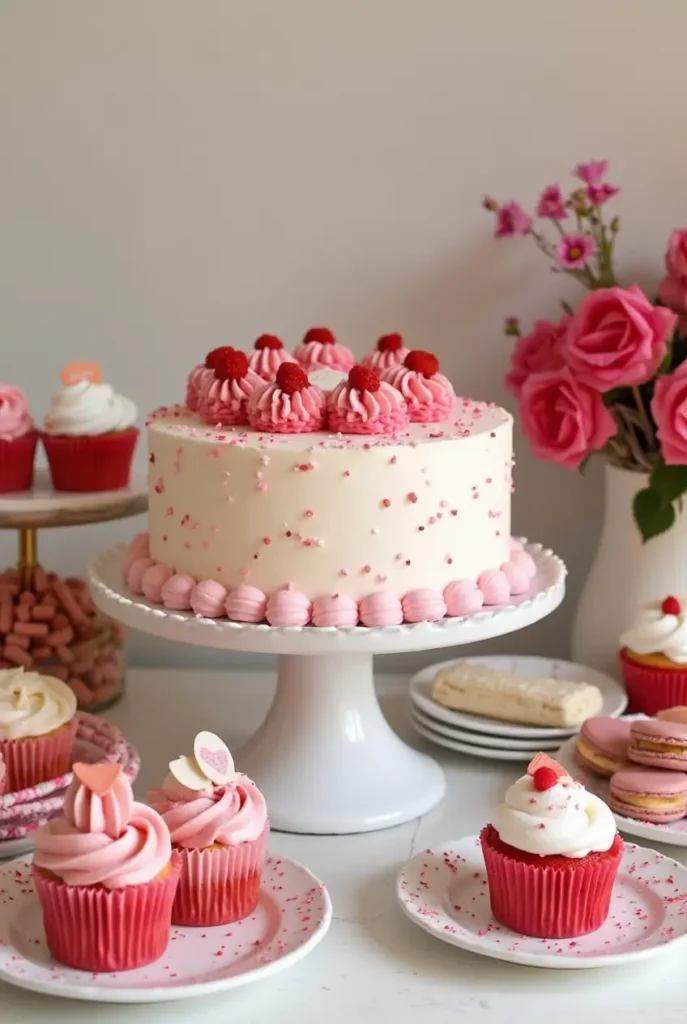
1. Valentine’s Day Inspiration
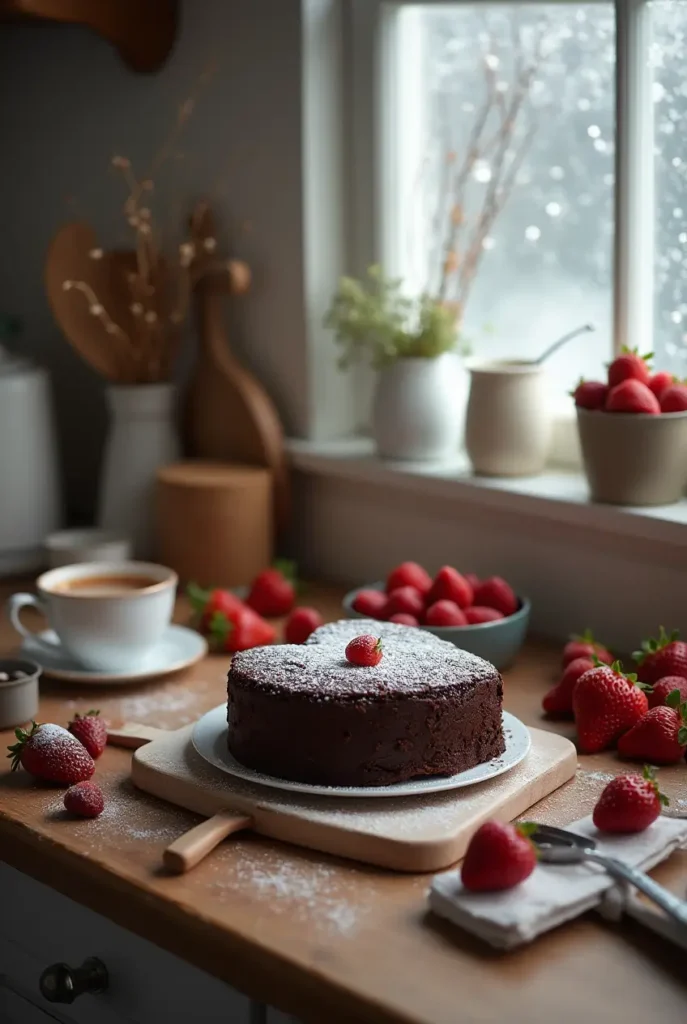
- Heart-shaped cakes with delicate buttercream roses.
- Shades of pink, red, and white for a romantic touch.
- Toppers like edible gold hearts or chocolate-covered strawberries.
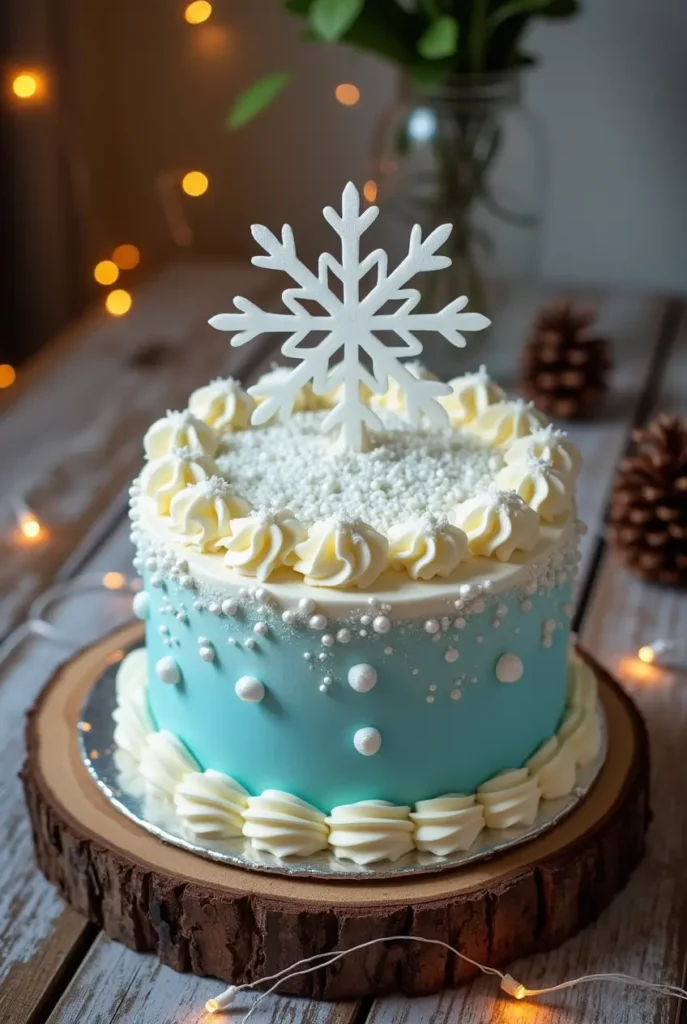
2. Winter Wonderland
- A cake frosted in snowy white with shimmering silver accents.
- Decorations like edible snowflakes or icy blue gradients.
- A cozy cinnamon or gingerbread flavor to warm the soul.
3. Zodiac Signs & Birthstones
- Aquarius (January 20–February 18): Incorporate water-like designs with blue hues and swirls.
- Pisces (February 19–March 20): Go dreamy with soft greens and fish-inspired motifs.
- February’s birthstone: Amethyst. Think purple ombre or sparkling sugar crystals.
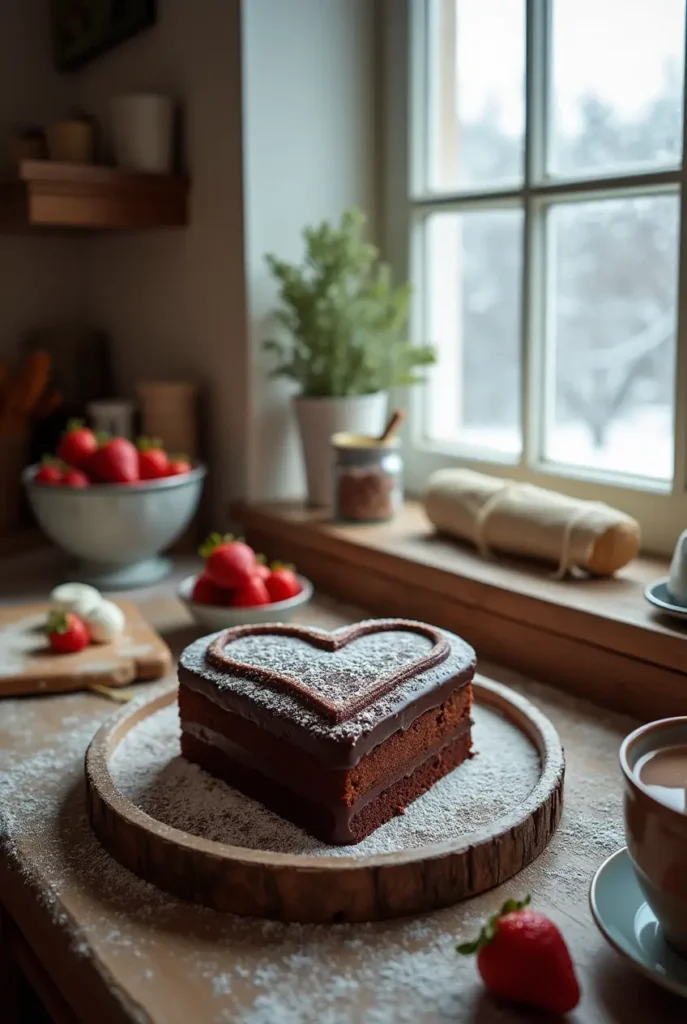
4. Rustic Elegance
- Semi-naked cakes with fresh berries and powdered sugar “snow.”
- Accents like rosemary sprigs or dried flowers for a sophisticated touch.
5. Kid-Friendly Fun
- Cartoon or superhero themes with February colors.
- Winter-themed characters like snowmen or penguins.
- A candy explosion cake with surprises inside.
Step 2: Pick the Right Flavor
Now that the theme is sorted, let’s talk flavors. February is all about rich, indulgent tastes that contrast beautifully with the cold weather outside.
Top Flavor Ideas:
- Chocolate & Berry: A classic combo—dark chocolate layers with raspberry or strawberry filling.
- Red Velvet: Iconic for February, with its vibrant red color and creamy frosting.
- Citrus Bliss: Lemon or orange cake adds a refreshing twist to wintery days.
- Spiced Delights: Think cinnamon, nutmeg, or ginger paired with cream cheese frosting.
- Amethyst-Inspired: Lavender or blueberry for a unique, purple-hued cake.
Pro Tip: Always balance flavors. If the frosting is sweet, keep the cake a little less sugary.
Step 3: Gather Your Tools and Ingredients
Here’s your must-have checklist to ensure a stress-free baking experience:
Ingredients:
- Base: All-purpose flour, sugar, eggs, and butter.
- Flavor: Vanilla extract, cocoa powder, or seasonal spices.
- Frosting: Cream cheese, buttercream, or ganache.
- Decorations: Fondant, edible glitter, berries, or chocolate shavings.
Tools:
- Mixing bowls, a stand or hand mixer, and measuring cups.
- A cake turntable for smooth icing.
- Piping bags and tips for detailed decorations.
- A sturdy cake board or stand for presentation.
Step 4: The Baking Process
Time to roll up your sleeves and get to work!
- Preheat Your Oven: Set it to 350°F (175°C) and grease your pans.
- Mix Dry Ingredients: Combine flour, sugar, baking powder, and a pinch of salt.
- Cream the Butter and Sugar: This step makes the cake light and fluffy.
- Add Eggs & Flavoring: One egg at a time, followed by vanilla or citrus zest.
- Combine Wet & Dry Mixtures: Alternate with milk or buttermilk to keep the batter smooth.
- Pour & Bake: Divide the batter into pans and bake for 25–30 minutes. Use a toothpick to check doneness.
Step 5: Decorating Your Masterpiece
Here’s where the magic happens. Decorating a February birthday cake is all about embracing the theme and having fun.
Basic Frosting Tips:
- Use a crumb coat for a smooth base.
- Chill the cake before adding final layers of frosting.
- Keep a damp cloth handy for clean edges.
Top Decoration Ideas:
- Valentine’s Day: Red drip icing with heart sprinkles.
- Winter Wonderland: Silver edible pearls and snowflake stencils.
- Amethyst Elegance: Ombre frosting with edible glitter.
- Kid-Friendly: Bright colors and playful toppers like mini toys.
Quick Pro Tip: Add some personal touches—a handwritten note on a topper or a sprinkle of the birthday person’s favorite candy can go a long way in making the cake memorable.
Decorating February Birthday Cakes Like a Pro
Once your cake has baked to golden perfection and cooled (because no one wants melted frosting drama!), it’s time for the best part—decorating. This is where you get to channel your inner artist and make your cake not just delicious but visually stunning. Whether you’re creating a Valentine’s Day masterpiece or a whimsical winter wonderland, I’ve got you covered with tips, tricks, and some fun ideas that will leave everyone saying, “Wow, you made that?”
Step 1: Nail the Frosting Base
A smooth, even base sets the stage for a professional-looking cake.
- Crumb Coat Magic: Start with a thin layer of frosting to trap crumbs.
- Use a spatula or bench scraper for even coverage.
- Chill the cake for 15–20 minutes to set the crumb coat.
- Final Layer: Add a thicker, flawless coat of frosting.
- Buttercream works beautifully for smooth finishes.
- For a glossy look, try ganache—just pour and spread gently.
- Color Coordination: Match frosting colors with your chosen theme:
- Soft pastels for a dreamy winter cake.
- Bold reds and pinks for a Valentine’s vibe.
Pro Tip: Don’t stress about perfection—imperfections add charm, and you can always cover flaws with decorations!
Step 2: Add Textures and Patterns
Textures make your cake look like it came straight from a Pinterest board.
- Rustic Vibes: Use a spatula to create swooping waves in the frosting.
- Ombré Effect: Blend two or three shades for a gradient that wows.
- Stencils & Sprinkles: Apply edible glitter, confetti, or powdered sugar for extra flair.
Step 3: Master the Art of Toppings
The toppings are where your creativity can truly shine.
- Seasonal Freshness:
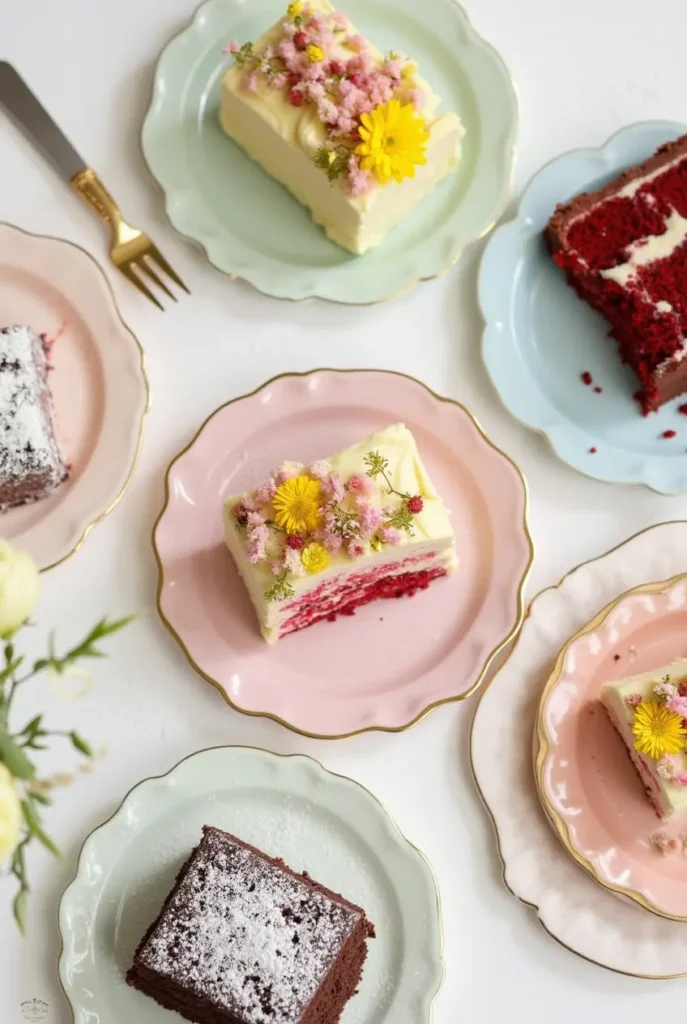
- Add strawberries, raspberries, or pomegranate seeds for a February-appropriate pop of color.
- Edible flowers like pansies or violets add elegance.
- Candy Love:
- Heart-shaped chocolates, candy canes, or conversation hearts scream Valentine’s Day.
- Use crushed peppermint or toffee for a wintery crunch.
- Personal Touches:
- Spell out the birthday person’s name with piped frosting.
- Add zodiac-inspired toppers for an Aquarius or Pisces-themed cake.
Step 4: Elevate with Themed Decorations
Themes make every cake unforgettable. Here are some easy-to-execute ideas:
- Winter Wonderland:
- Use shredded coconut for snow.
- Place edible snowflakes around the sides.
- Add small fondant penguins or snowmen for a playful touch.
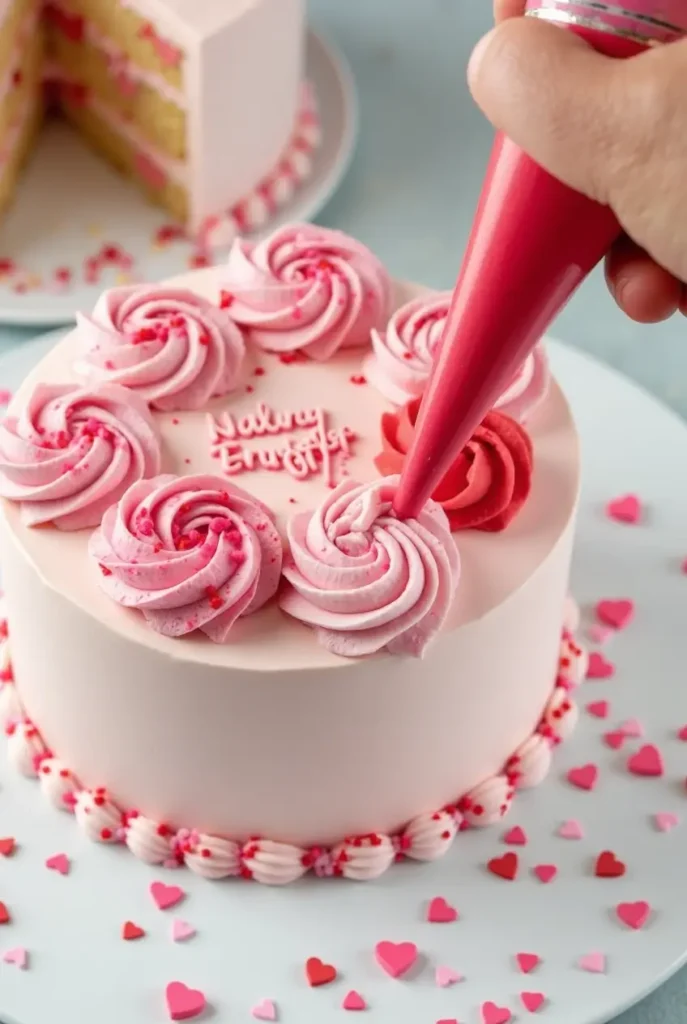
- Valentine’s Day Glam:
- Pipe buttercream roses in shades of red and pink.
- Add a chocolate ganache drip for drama.
- Finish with gold leaf accents for luxury.
- Birthstone Inspiration:
- For February’s amethyst theme, use purple frosting or sugar crystals.
- Add a touch of sparkle with edible glitter.
- Rustic Elegance:
- Opt for a semi-naked cake look, exposing some cake layers.
- Decorate with fresh rosemary sprigs and a dusting of powdered sugar for a frosty effect.
Step 5: Finishing Touches
The little details can make or break your cake’s presentation.
- Cake Stand Matters: Use a stylish cake stand to elevate your creation—literally and figuratively.
- Lighting is Key: When presenting the cake, soft lighting or candles can make it look even more magical.
- Photo-Worthy Moment: Snap a pic before slicing. You deserve the bragging rights on social media!
Quick Decorating Do’s and Don’ts
Do:
- Plan your design before starting.
- Use quality ingredients for frosting and decorations.
- Chill the cake when working with multiple layers or intricate designs.
Don’t:
- Frost a warm cake—patience is key.
- Overload on decorations; sometimes less is more.
- Stress if it’s not perfect. It’s homemade, and that’s the charm!
Table: Decoration Ideas at a Glance
| Theme | Key Colors | Suggested Toppings | Special Touches |
|---|---|---|---|
| Valentine’s Day | Red, Pink, White | Chocolate hearts, roses | Gold leaf, candy hearts |
| Winter Wonderland | White, Blue | Edible snowflakes, coconut | Fondant penguins, icy gradients |
| Zodiac-Inspired | Blue, Green, Purple | Zodiac toppers, sugar crystals | Name piping, shimmer dust |
| Rustic Elegance | Neutral tones | Berries, powdered sugar | Semi-naked frosting, herbs |
Choosing the Perfect February Birthday Cake Recipe
When it comes to baking a February birthday cake, it’s not just about the taste—it’s about creating a heartfelt masterpiece that celebrates the season and the person you’re honoring. Let’s dive into selecting the best recipe that’s not only delicious but also aligns with the vibes of February.
1. Seasonal Ingredients That Shine
The best cakes start with the right ingredients, and February offers some incredible seasonal options.
- Citrus Fruits: Oranges, lemons, and grapefruits are at their peak in February. Incorporate their zest or juice into your cake or frosting for a bright, refreshing flavor.
- Berries: While fresh strawberries might be rare, frozen ones work wonderfully for fillings and sauces.
- Chocolate: With Valentine’s Day vibes everywhere, chocolate is a must-have ingredient for February-themed cakes.
Pro Tip: Use high-quality chocolate or freshly grated zest to elevate the flavors—it’s the small details that make a big difference!
2. Popular February Cake Flavors
Here are some flavor combinations that scream “February birthday perfection”:
- Chocolate Raspberry Cake: A rich chocolate base with raspberry filling captures Valentine’s romance.
- Lemon Poppy Seed Cake: Bright and zesty, this option is ideal for citrus lovers.
- Red Velvet Cake: Classic, timeless, and always a hit for winter birthdays.
- Amaretto Almond Cake: A nutty, warm flavor perfect for cold February days.
Fun Fact: Red velvet became a February favorite thanks to its striking red hue and indulgent cream cheese frosting—it’s practically the dessert mascot of Valentine’s Day!
3. Consider Dietary Preferences
Nobody should miss out on cake, so catering to dietary needs is crucial.
- Gluten-Free Options: Almond or coconut flour makes for a moist and delicious cake.
- Vegan-Friendly: Substitute eggs with flaxseed or applesauce, and opt for plant-based milk and butter.
- Low-Sugar Alternatives: Use natural sweeteners like honey or maple syrup to reduce sugar while maintaining flavor.
4. Baking Tips for February Success
Now that you’ve decided on the flavor, it’s time to focus on execution.
- Room Temperature Ingredients: Always start with room temperature butter, eggs, and milk for a smoother batter.
- Preheat Your Oven: Ensure consistent heat for even baking.
- Use Seasonal Decorations: Top your cake with seasonal fruits, edible flowers, or even a dusting of powdered sugar to add a wintery touch.
5. Recipe Inspiration: Simple Yet Stunning Cakes
If you’re short on time but still want to impress, here are some quick recipes to consider:
- One-Bowl Chocolate Cake: Minimal cleanup, maximum flavor.
- No-Bake Cheesecake: Perfect if your oven is already occupied with other birthday treats.
- Bundt Cakes: Easy to make but elegant in presentation—just drizzle with icing, and you’re set!
Pro Tip: Don’t forget to write down your tweaks or additions to the recipe. It’s the best way to create your signature February cake!
Table: February Flavor Pairing Cheat Sheet
| Base Flavor | Filling Ideas | Frosting Suggestions | Toppings |
|---|---|---|---|
| Chocolate | Raspberry Jam | Dark Chocolate Ganache | Fresh Berries, Chocolate Shavings |
| Lemon | Lemon Curd | Vanilla Buttercream | Candied Lemon Slices |
| Red Velvet | Cream Cheese Frosting | Cream Cheese Frosting | Red Sprinkles, Edible Flowers |
| Almond | Amaretto Custard | Whipped Cream | Toasted Almond Slices |
Baking Techniques for February Birthday Cakes
Once you’ve selected the perfect recipe, it’s time to focus on the techniques that will take your February birthday cake from good to unforgettable. Here’s a step-by-step guide to ensure your cake not only tastes divine but also looks like a work of art.
1. Preparing Your Ingredients and Tools
Preparation is key when baking a cake, especially when aiming for perfection.
- Room Temperature Ingredients: Always let your butter, eggs, and milk come to room temperature before starting. This ensures smoother mixing and a fluffier cake.
- Measuring Accurately: Use measuring cups for dry ingredients and liquid measuring cups for wet ones. A kitchen scale is your best friend for precision!
- Essential Tools: Make sure you have the basics ready: a hand or stand mixer, mixing bowls, spatula, and a reliable oven thermometer.
Pro Tip: Preheat your oven for at least 15 minutes before baking. A consistent temperature is crucial for even baking.
2. Mastering the Batter
Your cake batter sets the foundation for your dessert. Here’s how to get it just right:
- Mixing Dry and Wet Ingredients: Always mix dry and wet ingredients separately first. Gradually combine them to avoid lumps.
- Avoid Overmixing: Once the wet and dry ingredients are combined, mix just until incorporated. Overmixing can lead to a dense cake.
- Adding Flavors and Textures: This is where creativity shines. Swirl in raspberry jam for a burst of flavor or fold in chocolate chips for a little crunch.
Did You Know? Overmixed batter can activate gluten in the flour, which makes cakes chewy instead of tender.
3. Baking Like a Pro
Here are some insider tips to ensure your cake bakes perfectly every time:
- Greasing the Pans: Line your pans with parchment paper and lightly grease the edges to prevent sticking.
- Pan Placement: Place pans in the center of the oven for even heat distribution. If baking multiple layers, ensure there’s space between them.
- Timing is Everything: Stick to the recommended baking time but check for doneness by inserting a toothpick in the center. If it comes out clean, your cake is ready!
4. Cooling and Leveling the Cake Layers
This step is crucial for creating a stable, professional-looking cake.
- Cool Completely: Let the cake cool in the pans for 10 minutes, then transfer to a wire rack. Attempting to frost a warm cake is a recipe for disaster.
- Leveling the Layers: Use a serrated knife or a cake leveler to trim the domed tops of your cake layers. This ensures a flat surface for stacking.
Fun Fact: Professional bakers often chill their cake layers before frosting. It reduces crumbs and makes the process much smoother!
5. Frosting and Decorating Like a Designer
Now comes the fun part—transforming your cake into a showstopper!
- Crumb Coat: Start with a thin layer of frosting to trap crumbs. Chill the cake for 15–30 minutes before adding the final coat.
- Smooth Frosting: Use an offset spatula or bench scraper for that sleek, professional finish.
- Add Seasonal Decorations: Incorporate February themes like heart-shaped candies, edible flowers, or chocolate curls.
Table: Essential Baking Techniques for February Birthday Cakes
| Step | Key Tips | Pro Tools to Use |
|---|---|---|
| Ingredient Prep | Use room temp ingredients | Kitchen scale, measuring cups |
| Mixing Batter | Mix until just combined, avoid overmixing | Stand/hand mixer, spatula |
| Baking | Place pans centrally, preheat oven | Oven thermometer, parchment paper |
| Cooling and Leveling | Cool completely, level with a knife | Wire rack, serrated knife |
| Frosting and Decorating | Crumb coat first, add personal touches | Offset spatula, bench scraper |
Final Thoughts
Perfecting your baking technique may take practice, but the results are always worth it. Remember, the joy of baking comes from the process itself, and every cake is a delicious opportunity to learn and experiment. Have fun and don’t forget—every masterpiece starts with a single whisk of batter!
Conclusion
So there you have it—the ultimate guide to creating a February birthday cakes that’s not just a dessert but a centerpiece of celebration. From choosing the flavors that speak to the season to mastering those baking techniques that’ll have everyone asking for your recipe, you’re now equipped to bake with confidence.
FAQ: February Birthday Cakes
Q: What are the best flavors for February birthday cakes?
A: Rich flavors like chocolate, red velvet, or spiced carrot cakes are perfect for February. For a lighter option, vanilla or lemon cakes work beautifully.
Q: Can I make a heart-shaped cake without a special pan?
A: Absolutely! Use a round pan and a square pan. Cut the round cake in half and place the halves on adjoining sides of the square cake to form a heart.
Q: How can I decorate a cake for a Valentine’s-themed birthday?
A: Think heart-shaped sprinkles, red and pink frosting, and edible glitter. Adding chocolate-covered strawberries or piped flowers also makes a stunning impression.
Q: What’s a good frosting option for winter cakes?
A: Buttercream frosting is versatile and easy to work with. Cream cheese frosting is another great choice for a tangy contrast to rich cake flavors.
Q: How far in advance can I bake and frost a cake?
A: Bake the cake layers up to two days in advance and store them wrapped in plastic. Frost the cake a few hours before serving for the freshest taste.