Introduction
Now, if you’re like me, the idea of crafting something that looks as good as it tastes can feel a bit overwhelming. But fear not! This guide will walk you through the steps to create your very own Paw Patrol cake topper, blending creativity and a pinch of fun.Along the way, I’ll share tips, tricks, and maybe a few laughs because, let’s face it, cake-making should be as enjoyable as it is rewarding. So, grab your rolling pin and let’s dive into the delightful world of cake decorating!
Understanding Paw Patrol Cake Toppers
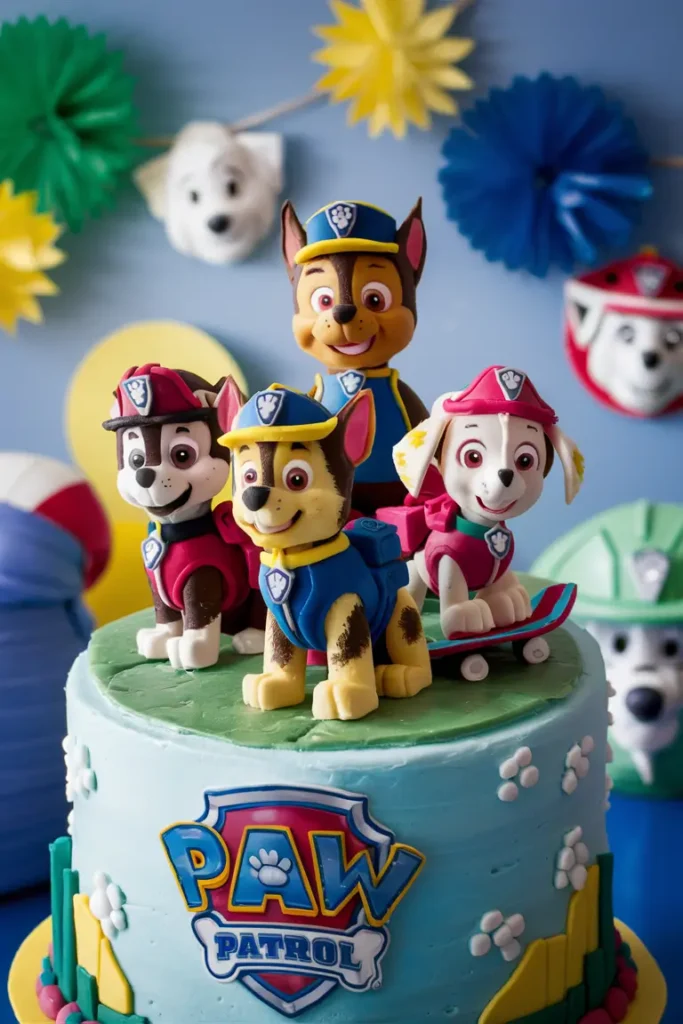
Imagine the joy on your child’s face when they see a vibrant Paw Patrol cake topper perched proudly atop their birthday cake. It’s not just a decoration; it’s the cherry on top of an unforgettable celebration. Let’s dive into why these cake toppers are so beloved and how you can easily create one yourself!
What is a Cake Topper?
A cake topper is simply a decorative element placed on top of a cake, and it can be anything from simple letters to intricate characters. For a Paw Patrol cake topper, we’re talking about those adorable pups that kids absolutely can’t get enough of. They add a personal touch that transforms an ordinary cake into a delightful masterpiece.
Why Choose a Paw Patrol Theme?
So, why go for a Paw Patrol theme? Well, if your little one is a fan of Ryder and his heroic pups, a cake topper featuring their favorite character will make the dessert feel extra special. The show promotes teamwork and friendship, making it a fantastic choice for birthday celebrations.
Materials Needed for Making Paw Patrol Cake Toppers
Let’s talk materials. You’ll need a few basic supplies to create your own Paw Patrol cake topper:
- Fondant or Gum Paste: This is your canvas for crafting. You can find colorful options that match the Paw Patrol characters.
- Food Coloring: To make those pups pop with vibrant colors.
- Tools: A rolling pin, shape cutters, and a modeling tool will help you shape your characters.
- Edible Glue: This is great for sticking pieces together.
You can find these items in local craft stores or online. Don’t worry if you’re new to this; the materials are user-friendly and fun to work with!
Overview of the Creating Process
Creating a Paw Patrol cake topper at home might sound daunting, but I promise it’s easier than you think. Here’s a sneak peek at the process:
- Plan Your Design: Decide which character(s) you want to create.
- Prepare Your Workspace: Clear a space where you can spread out your materials.
- Shape Your Characters: Roll and mold the fondant into the desired forms.
- Add Colors and Details: Use food coloring to bring your characters to life.
- Assemble the Topper: Put everything together and let it dry.
By breaking it down into these simple steps, you’ll find that making your own Paw Patrol cake topper can be a fun and rewarding experience!
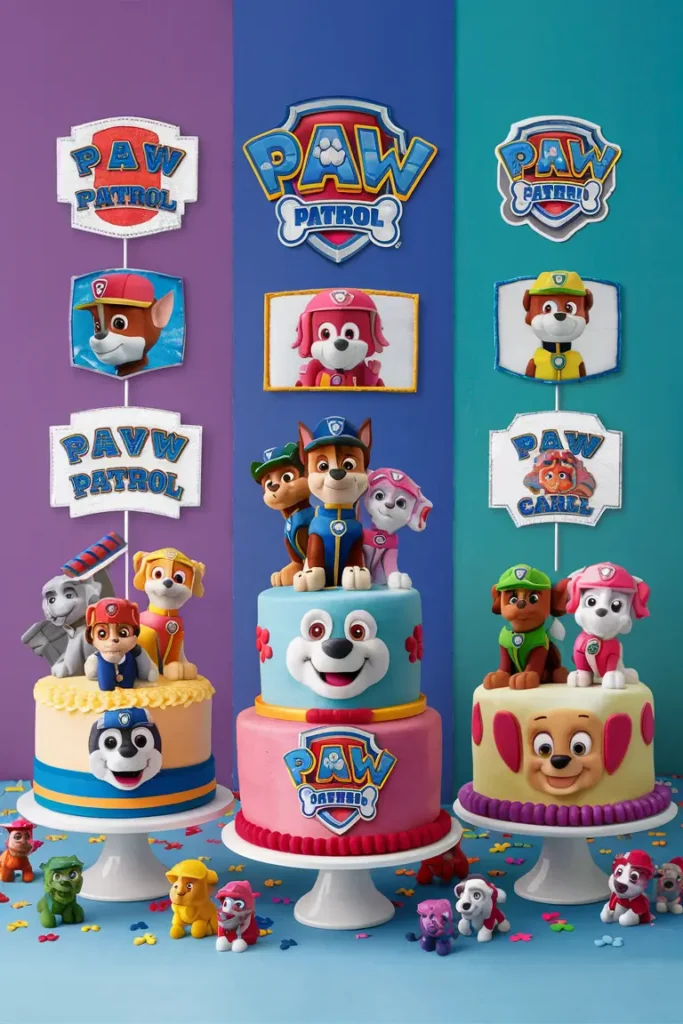
Inspiration and Design Ideas
Need some creative ideas to get started? Here are a few tips on designing your cake topper:
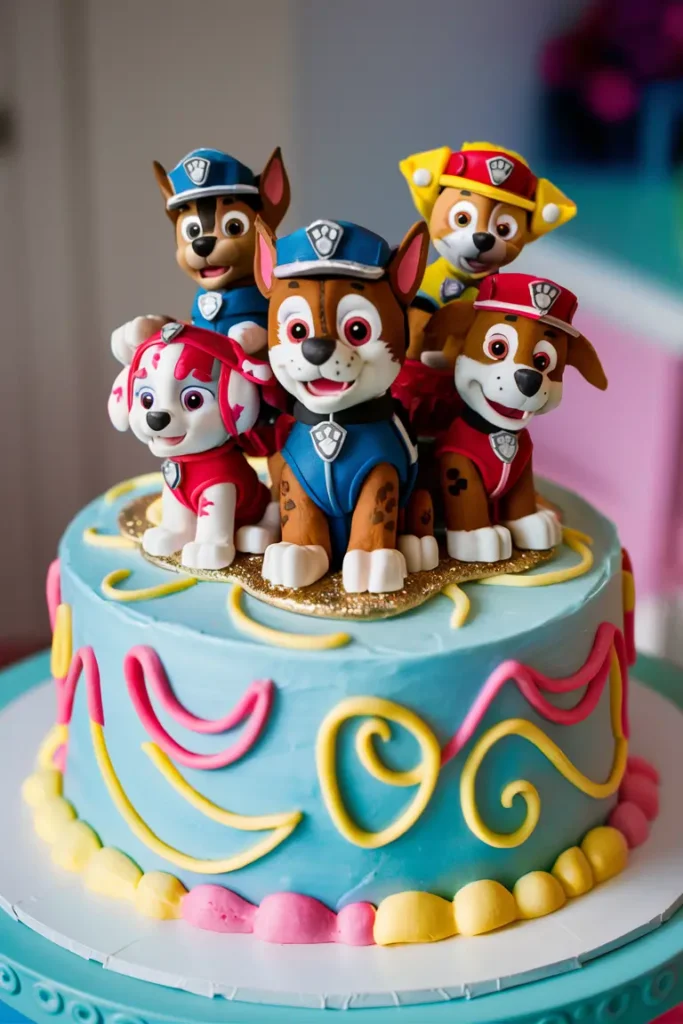
- Character Focus: Choose one or two favorite characters, like Chase and Skye, and showcase them prominently.
- Layered Designs: Consider creating a multi-tiered topper with several pups for a dynamic look.
- Color Themes: Match the colors of the cake with those of the Paw Patrol uniforms for a cohesive design.
Step-by-Step Guide to Creating a Paw Patrol Cake Topper
If you’re ready to roll up your sleeves and craft an awesome Paw Patrol cake topper, you’re in the right place! Creating your own cake topper can be a fun and rewarding project, and I’m here to guide you through each step of the process. Let’s get started!
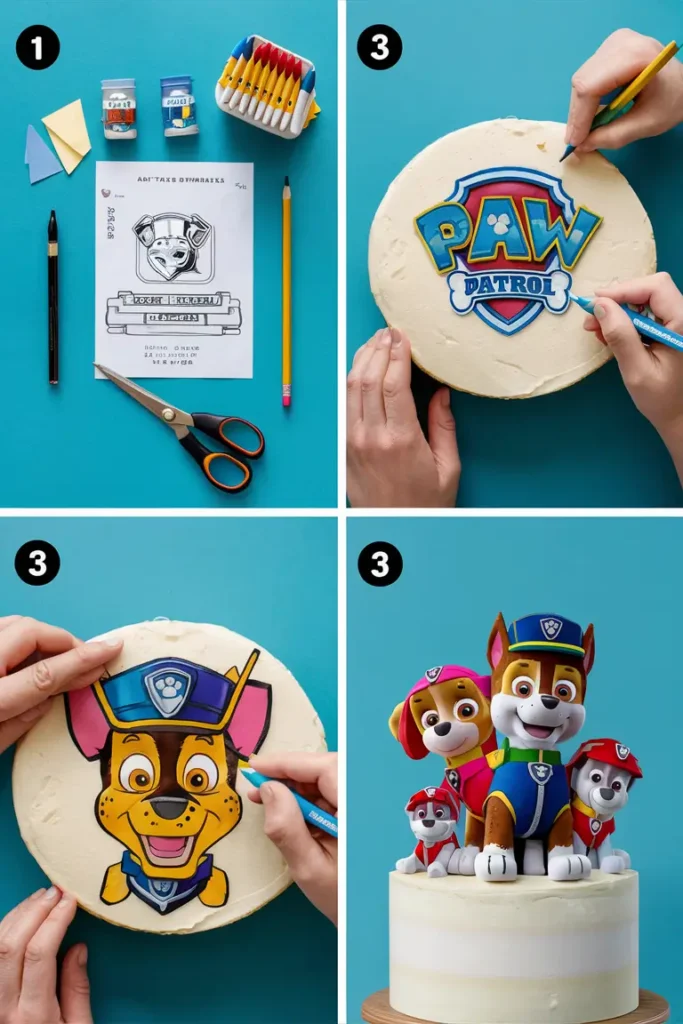
Step 1: Preparing Your Workspace
First things first—let’s get your workspace prepped. You want to create in a clean and organized area so you can focus on making that perfect Paw Patrol cake topper. Here’s how to set up:
- Clear a flat surface: A kitchen counter or dining table works perfectly. Make sure it’s clean to avoid any unwanted surprises!
- Gather your materials: Lay out all your supplies—fondant, food coloring, tools, and any decorations. Having everything at hand makes the process smoother.
- Protect your space: Use parchment paper or a silicone mat to keep your area tidy. Trust me; this will save you a cleanup headache later!
Step 2: Crafting the Characters
Now it’s time to bring your favorite Paw Patrol pups to life! Here’s a straightforward breakdown of how to get started:
- Choose Your Character: Let’s say you want to create Chase. Start by rolling a ball of fondant for his head and a larger piece for his body.
- Shape the Body: Use your fingers to mold the body into the right shape—don’t stress about perfection; a little character adds charm!
- Add the Details:
- Roll out smaller pieces of fondant for the ears, paws, and tail.
- Use a small tool to add facial features like eyes and the signature paw badge.
- Tip: If you’re feeling adventurous, you can mix colors to get the exact shades you want!
Step 3: Coloring and Decorating
Once you’ve got the basic shapes, let’s spice things up with some color! Here’s how to make your Paw Patrol cake topper shine:
- Food Coloring: Use gel food coloring for vibrant hues. Just a tiny bit goes a long way.
- Painting the Details: A small brush works wonders for adding details like stripes on uniforms or spots on their fur.
- Texture and Finish: Add some shimmer with edible glitter if you want that extra sparkle!
Step 4: Assembling the Topper
Now that your characters are looking great, it’s time to assemble your masterpiece:
- Secure the Pieces: Use edible glue to attach different parts together. It’s like cake glue, perfect for keeping everything in place.
- Layer Your Characters: If you’re creating multiple characters, think about how they’ll fit together. Layering can add depth and interest.
- Let It Dry: Once assembled, let your topper dry for a few hours (or overnight) to ensure stability.
Step 5: Final Touches and Presentation
You’re almost there! Let’s put the icing on the cake—literally:
- Finishing Touches: Use a clean brush to remove any excess powder or glitter. This will help your Paw Patrol cake topper look polished and professional.
- Placement: When your cake is ready, gently place the topper on with care. I like to give it a little twist to make sure it’s secure—like a little dance for your cake!
- Capture the Moment: Snap some photos before everyone digs in. These moments are precious, and you’ll want to remember the glee on your child’s face when they see their favorite pups!
Alternate Methods for Creating Paw Patrol Cake Toppers
So, you’ve decided to make a Paw Patrol cake topper, but what if you’re looking for a few alternative methods? Whether you want to save time or just explore your creativity, there are other fun ways to create a cake topper that your kids will adore. Let’s dive into some exciting options!
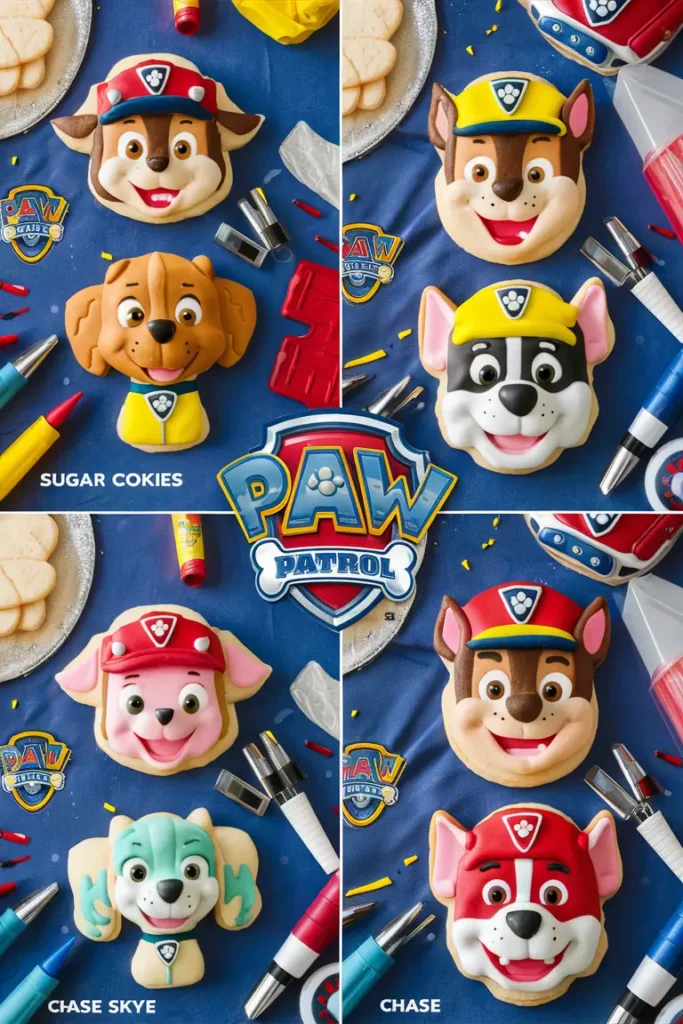
Using Edible Images
One of the easiest ways to create a Paw Patrol cake topper is by using edible images. Here’s how it works:
- What are Edible Images?: These are printed images made from edible ink on special paper. They can be customized to feature your favorite Paw Patrol characters.
- Steps to Use Edible Images:
- Order Online: Many bakeries offer services to create custom edible images. Just send them your desired design or choose from a catalog.
- Cut and Apply: Once you receive your edible image, cut it out and place it on your cake after frosting.
- Seal It: Use a light glaze or a bit of water to help it adhere to the cake and give it some shine.
This method is quick and perfect for parents who want a professional-looking cake without the fuss of detailed crafting!
Simple Paper Cake Toppers
If you’re not up for the fondant fun, consider making simple paper cake toppers. Here’s how you can easily whip these up:
- Materials Needed:
- Colored cardstock
- Craft scissors
- Toothpicks or cake dowels
- Glue
- Steps to Create Paper Toppers:
- Design Your Characters: Draw or print out pictures of the Paw Patrol pups on cardstock.
- Cut Them Out: Carefully cut around the designs, leaving a bit of extra paper at the bottom for attaching.
- Attach to Sticks: Glue the cutouts to toothpicks or dowels, making them easy to insert into the cake.
This is an inexpensive and straightforward approach that allows for a lot of creativity. Plus, you can even involve your little ones in the process!
Store-Bought Options
Sometimes, life gets busy! If you’re short on time but still want a fabulous Paw Patrol cake topper, don’t hesitate to consider store-bought options. Here are some things to look for:
- Pre-Made Cake Toppers: Most party supply stores stock character cake toppers, including those adorable pups from Paw Patrol.
- Pros and Cons:
- Pros: Saves time and guarantees a professional look.
- Cons: Limited customization; you might not find exactly what you envisioned.
Alternative Craft Materials
If you’re feeling adventurous, why not try creating your topper with alternative materials? Here are a few ideas:
- Chocolate Cake Toppers: Melt some chocolate and pour it into molds shaped like the Paw Patrol characters. Once set, they make a delicious and decorative touch!
- Plastic Toys: Use small Paw Patrol figurines as cake toppers. They double as party favors and save you the hassle of crafting!
Creative Theme Variations
Why stick with just Paw Patrol? Here’s where you can get creative:
- Mix Themes: If your child loves other shows or interests, consider combining them. A Paw Patrol and superhero theme can lead to some fun character mash-ups.
- Coordinate Colors and Styles: Make sure that regardless of the characters, your color scheme remains cohesive for that Instagram-worthy cake shot!
Tips for a Successful Paw Patrol Themed Birthday Party
Congratulations! You’ve just made a fantastic Paw Patrol cake topper that’s sure to wow the kids and make your little one feel like a superstar. But the fun doesn’t stop there! To take your birthday celebration to the next level, here are some tips to seamlessly incorporate that cake topper into a memorable Paw Patrol themed birthday party.
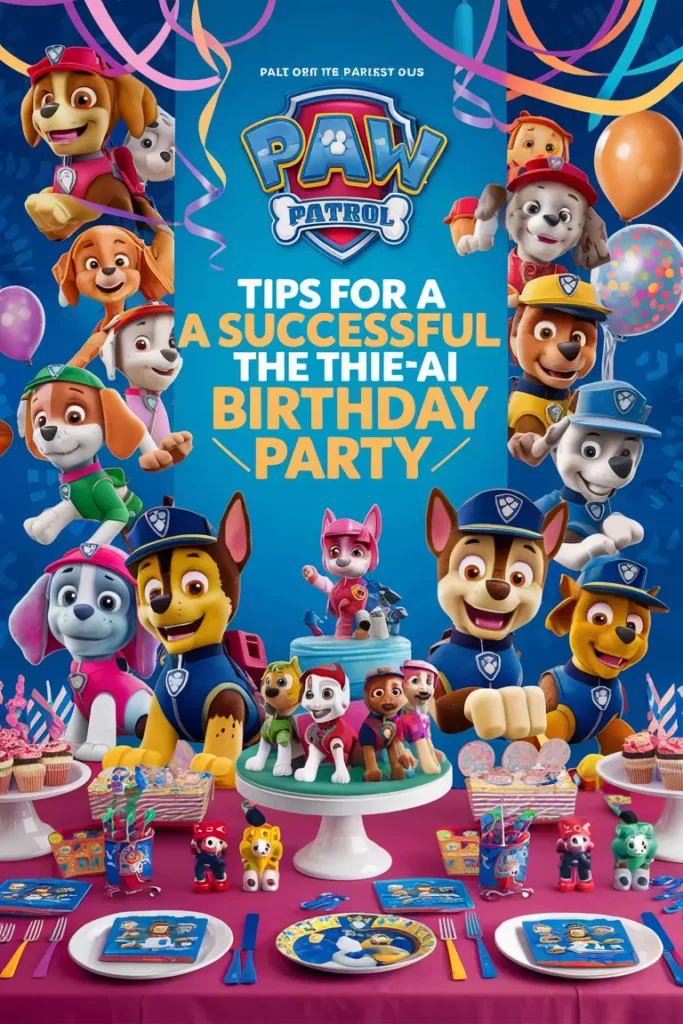
Incorporating Cake Toppers into Party Decor
Your Paw Patrol cake topper is not just for the cake; it can also be a central theme for your party décor. Here are a few ideas to consider:
- Matching Decor: Coordinate your cake topper colors with balloons, tableware, and banners. Think bold blues, cheerful yellows, and the signature red of Chase’s uniform.
- Display Options: Place your cake topper on a decorative cake stand to elevate its presence. Surround it with themed decorations like figurines and party hats.
- DIY Photo Booth: Create a fun photo booth with a Paw Patrol backdrop. Use your cake topper as part of the photo setup for those Instagram-worthy shots. Trust me; the kids will love it!
Engaging Kids During the Party
Keeping kids entertained can sometimes feel like herding cats, but with a Paw Patrol theme, the adventure practically runs itself! Here are some exciting activities to keep everyone busy:
- Paw Patrol Obstacle Course: Set up a mini obstacle course in your backyard. Kids can pretend to be the pups on a mission!
- Craft Stations: Provide materials for kids to make their own Paw Patrol masks or decorate cupcakes with your cake topper design in mind.
- Games: Classic games like “Pin the Badge on Chase” or a Paw Patrol scavenger hunt can keep the energy high and the smiles bright.
Documenting the Celebration
You’ll want to capture all these magical moments, so don’t forget to document the celebration! Here are some tips:
- Photography Tips: Use natural light whenever possible. Position kids near windows or outside for the best shots. Capture candid moments when they’re playing or interacting with the Paw Patrol cake topper!
- Family Video: Consider making a short video montage throughout the party, highlighting the cake cutting and fun activities. It’s a great way to relive those memories later.
Feedback from Parents
Here’s a little insider tip: don’t shy away from asking for feedback from other parents. Recently, I overheard a fellow parent rave about how their little one couldn’t stop talking about a Paw Patrol birthday party they attended. They said the standout moment was a creative cake topper that matched the overall theme perfectly. Hearing experiences like this can inspire you and give you confidence in your own party planning decisions!
Resources for Further Learning
Feeling inspired? You can find tons of resources online to help elevate your party planning game. Here are some ideas to explore:
- DIY Blogs and Videos: Websites like Pinterest and YouTube have an endless supply of DIY ideas for Paw Patrol-themed parties.
- Cake Decorating Tutorials: There are many expert cake decorators who share tips and techniques for creating stunning cake toppers and cakes. YouTube is a treasure trove for this!
- Party Planning Communities: Join Facebook groups or forums where parents share their experiences and ideas. You’ll find a wealth of inspiration!
Conclusion
Congratulations! You’re now fully equipped to create a stunning Paw Patrol cake topper that will leave your guests and birthday child in awe. We’ve explored everything from crafting the characters to throwing an unforgettable themed party. So, whether you’re a seasoned baker or a first-timer, remember that the journey is just as important as the destination. Each cake you create is a new adventure, filled with laughter and creativity.Now, as you prepare for that special day, why not take a moment to imagine the smiles (and maybe even happy tears) that will light up the room? Your Paw Patrol cake topper isn’t just a decoration—it’s a memory in the making. Trust me, when you see those joyful little faces enjoying the cake you made, all the effort will be worth it.
FAQ
Q: How long does it take to make a Paw Patrol cake topper?
A: Depending on the complexity of your design, it usually takes about 1-2 hours, including drying time for fondant or other materials.
Q: Can I make a Paw Patrol cake topper in advance?
A: Absolutely! You can make your topper 1-2 days in advance and store it in a cool, dry place. Just be careful not to expose it to moisture.
Q: What if I’m not good at cake decorating?
A: No worries! The beauty of a Paw Patrol cake topper is that it can be as simple or as detailed as you’d like. Start small and have fun with it!
Q: Where can I find materials for making a cake topper?
A: Most craft stores or baking supply shops will have what you need. You can also check online for fondant, edible colors, and tools.
Q: Is there a way to use a Paw Patrol cake topper for a themed party?
A: Definitely! Coordinating decorations, games, and treats with your cake topper theme can create a cohesive and exciting party experience.