
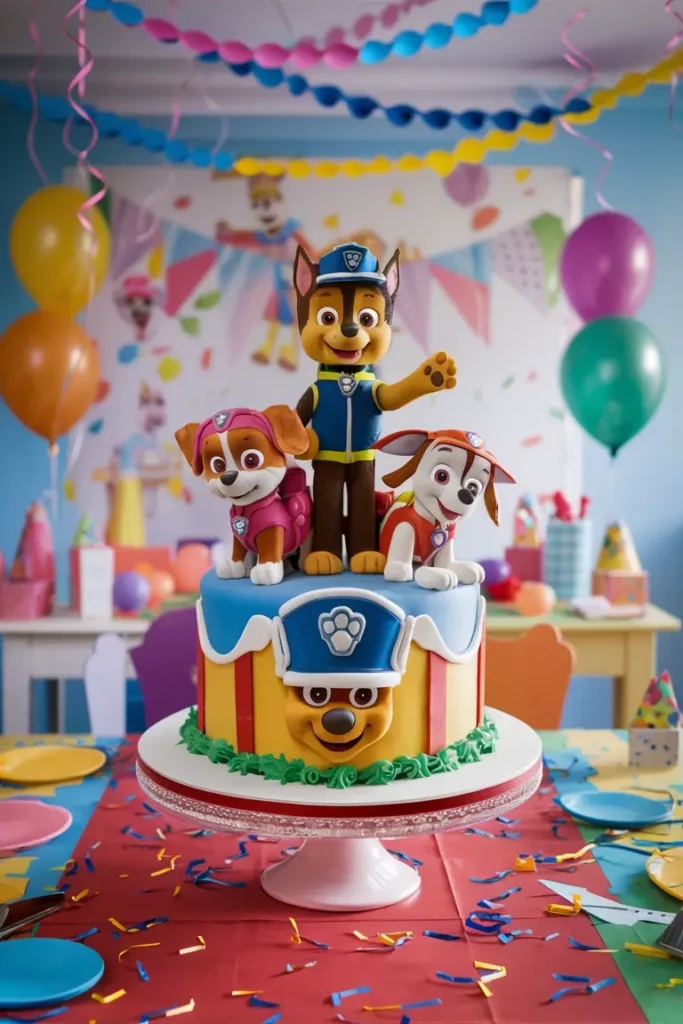
Introduction: The Perfect Paw Patrol Cake for Your Little One’s Special Day
When it comes to planning a child’s birthday, few things are more exciting than creating a memorable cake. A Paw Patrol cake, featuring its lovable pups and colorful designs, is a surefire way to delight kids and bring joy to the celebration. Imagine the look on their faces when they see a cake that looks just like their favorite characters, all made with care and creativity.
This article will show you how to make the perfect Paw Patrol cake from scratch, using simple steps that anyone can follow. Not only will you create something impressive, but you’ll also get to enjoy the process of baking and decorating your very own masterpiece.
Why a Paw Patrol Cake is a Great Choice for Kids’ Birthdays
Paw Patrol is more than just a TV show; it’s a beloved world of adventurous pups who work together to solve problems and help their community. For a birthday cake, this theme offers a great opportunity to incorporate bright colors, fun designs, and an easy-to-love concept that resonates with children. The characters are universally adored, and a cake featuring them will undoubtedly stand out as the highlight of the party. Whether it’s a cake designed to look like Chase, Marshall, or Skye, a Paw Patrol cake is guaranteed to add excitement and a dash of adventure to the event.
How Easy It Is to Create at Home
The best part about creating a Paw Patrol cake at home is how achievable it is. With just a little time, creativity, and the right ingredients, anyone can craft a cake that rivals those from a bakery. While it may seem like an intricate task, following the simple steps outlined in this guide will help you breeze through the process, resulting in a cake that looks impressive and tastes amazing.
Gathering Your Ingredients and Tools: The Essential Supplies You’ll Need
Before you dive into the fun, it’s essential to gather everything you’ll need for the cake. Being organized and having all your supplies ready will make the process smoother and more enjoyable. From the right tools to the perfect ingredients, let’s get started.
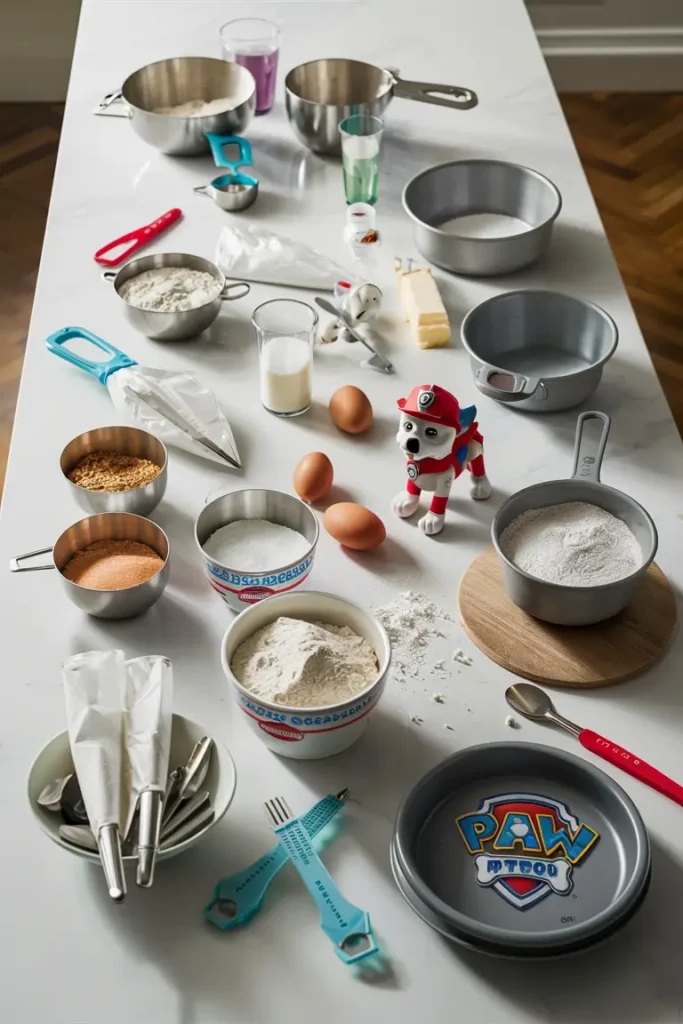
Key Ingredients for the Cake and Frosting
Start with the basics: flour, sugar, eggs, and butter. These are the foundation for your cake layers. Choose a cake flavor that will appeal to your child—whether it’s a classic vanilla, chocolate, or a more adventurous flavor like strawberry or funfetti. The frosting is equally important; you’ll need butter, powdered sugar, heavy cream, and a splash of vanilla extract. For vibrant colors, gel food coloring is a must.
Must-Have Baking Tools and Equipment
To bake the cake, you’ll need a few standard tools, including a mixing bowl, measuring cups, and a whisk or electric mixer. For decorating, a piping bag with various tips, a spatula for smoothing frosting, and an offset spatula for precision will be invaluable. Don’t forget cake pans, preferably 8-inch round ones, for perfect layers.
Paw Patrol Cake Decorations: Where to Find Them
You can find Paw Patrol-themed cake toppers, edible images, and figurines at many craft stores or online retailers. Alternatively, you can create your own decorations using fondant or frosting. If you’re looking for a quick and easy way to decorate, pre-made decorations are a convenient option, though DIY elements can add a personal touch.
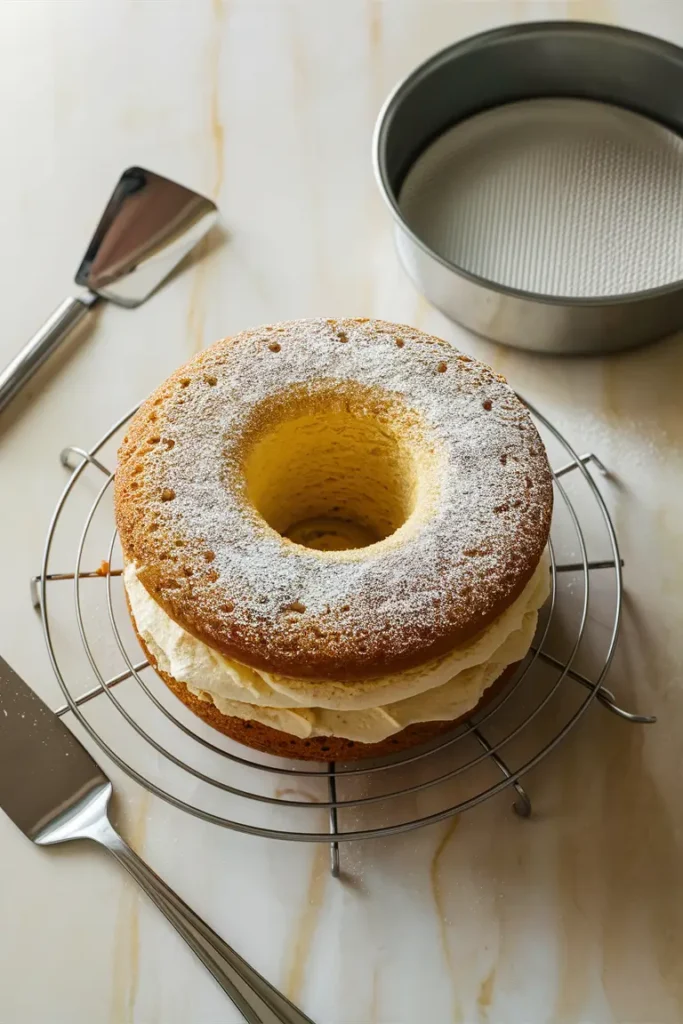
Step 1: Bake the Cake Layers with Love and Care
Creating the perfect cake begins with the baking process. This is where the foundation for your Paw Patrol masterpiece is laid, and every detail counts.
Choosing the Right Cake Flavor for a Paw Patrol Theme
While vanilla is always a popular choice, a colorful funfetti cake can really bring a playful energy to the theme. If your child loves chocolate, why not opt for a rich chocolate cake with a contrasting light-colored frosting? Remember, the flavor is just as important as the design, so choose one that both kids and adults will love.
Baking Tips for Perfectly Moist Cake Layers
The key to a moist cake is not over-mixing the batter and keeping a close eye on the baking time. Be sure to grease your pans well or use parchment paper to prevent the cakes from sticking. Once baked, let the layers cool completely before frosting them—this ensures the frosting doesn’t melt and slide off the cake.
Step 2: Let’s Get Frosting: Preparing Your Frosting Base
Frosting is where the fun begins. It’s your canvas, and you’ll use it to bring the vibrant world of Paw Patrol to life. Whether you choose buttercream or cream cheese frosting, this step is crucial for both flavor and aesthetics.
The Best Frosting Recipes for a Colorful and Tasty Cake
A classic buttercream frosting is the easiest and most versatile choice. For a smooth texture, cream the butter and powdered sugar together until light and fluffy, adding a little milk or cream as needed. For a tangy twist, try a cream cheese frosting. If you want something lighter, whipped cream-based frostings are also an excellent choice.
Tips for Achieving Smooth and Even Frosting
Use an offset spatula for spreading the frosting evenly over the cake. For a smooth finish, after applying the first coat of frosting (crumb coat), refrigerate the cake to set it before adding the final layer. This technique ensures a clean and polished look, especially when layering multiple colors or designs.
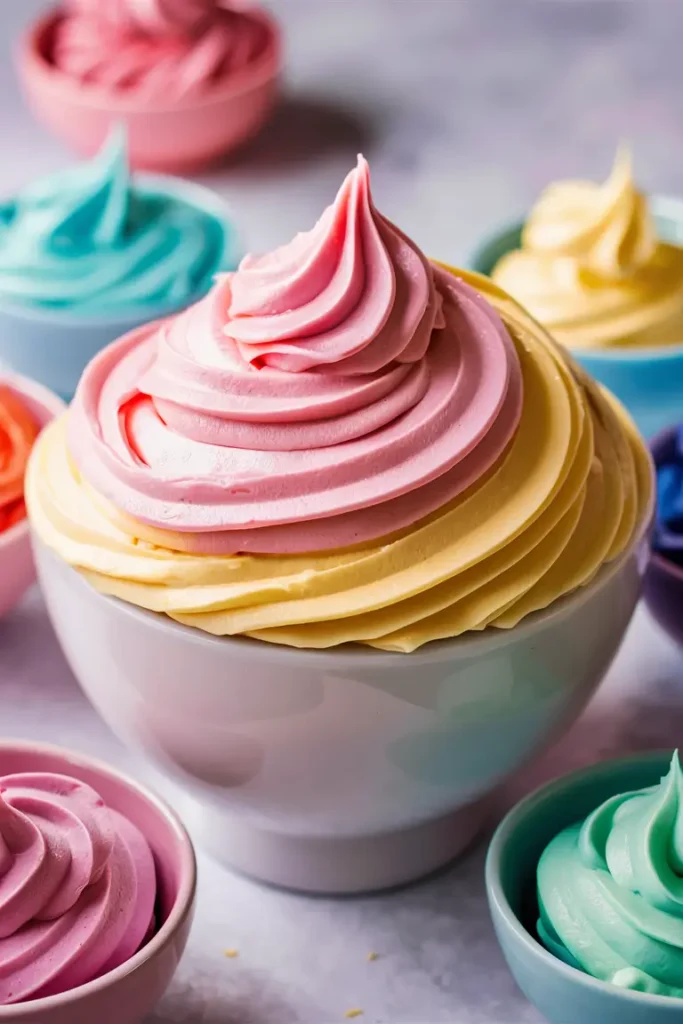
Step 3: Coloring Your Frosting: How to Create Vibrant Paw Patrol Colors
The iconic colors of Paw Patrol—red, blue, yellow, and green—are essential for bringing the theme to life.
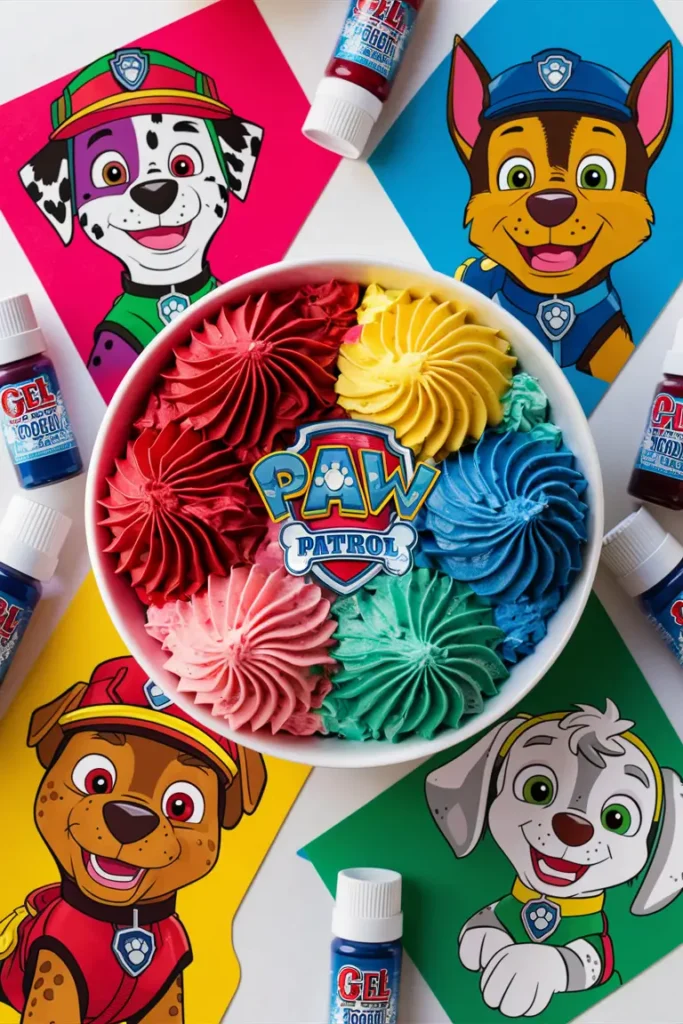
Mixing the Right Shades: Red, Blue, Yellow, and More
Use gel food coloring for a rich, vibrant hue that won’t water down your frosting. To create bright red, blue, and yellow shades, start with a small amount of coloring and gradually increase until you reach the desired intensity. Remember to mix well to avoid streaks.
Using Gel Food Coloring for Bright and Bold Results
Gel food coloring gives you the brightest and most vivid colors. It’s also easier to control than liquid dyes, ensuring you achieve the perfect shades for each part of the cake.
Step 4: Assembling the Cake Layers: Stack it Up!
Now that your cake layers are cooled and your frosting is ready, it’s time to bring it all together.
How to Layer Your Cake for Stability and Style
Place the first layer of cake on a cake board or serving platter. Apply a generous layer of frosting and top with the second cake layer. Be sure to spread the frosting evenly and press down gently to avoid any bulging or uneven layers. Repeat with any additional layers.
Cutting Your Layers for a Paw Patrol Shape
For a truly themed design, you may need to trim your layers slightly to create a more cohesive shape. Round cakes work beautifully for simple designs, but you could also carve out shapes or designs to fit a specific character.
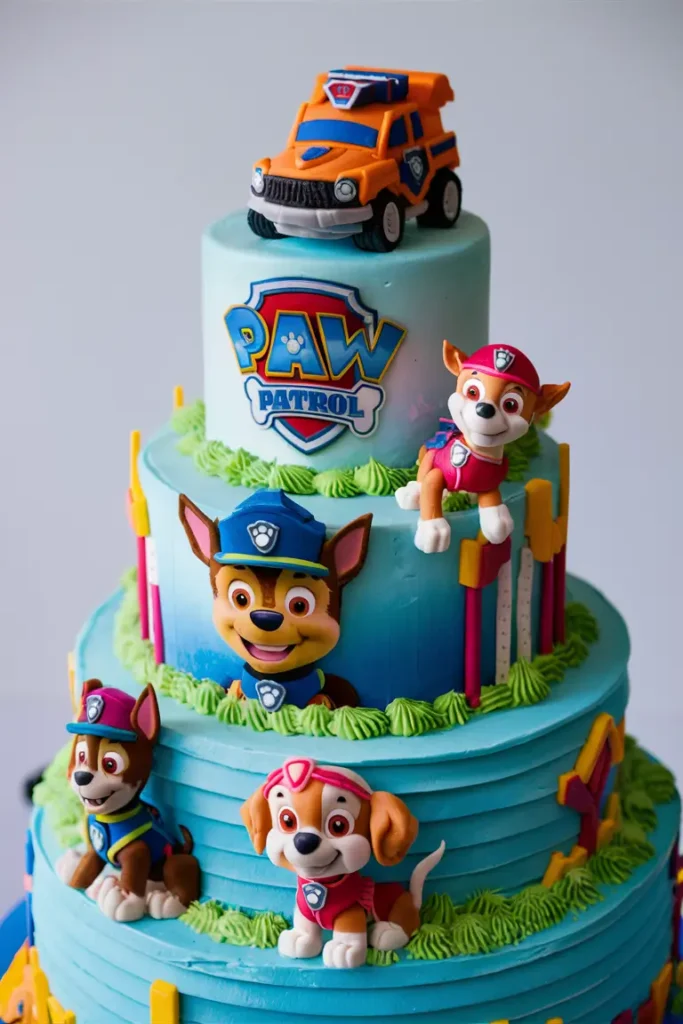
Step 5: Creating the Paw Patrol Shape and Design
Creating the Paw Patrol look is all about attention to detail and using simple techniques to craft a memorable design.
Tips for Shaping the Cake to Match the Paw Patrol Theme
Think about the character you want to highlight. For example, Chase, the police dog, has a recognizable uniform with blue and yellow accents. You can mold your cake into a round shape to resemble his head or create a themed landscape using different elements.
Using Piping Bags to Create the Perfect Outline
Piping bags allow you to create fine details like outlines, ears, and facial features. Use different tips to vary the thickness and style of your designs, allowing you to add dimension and personality to the cake.
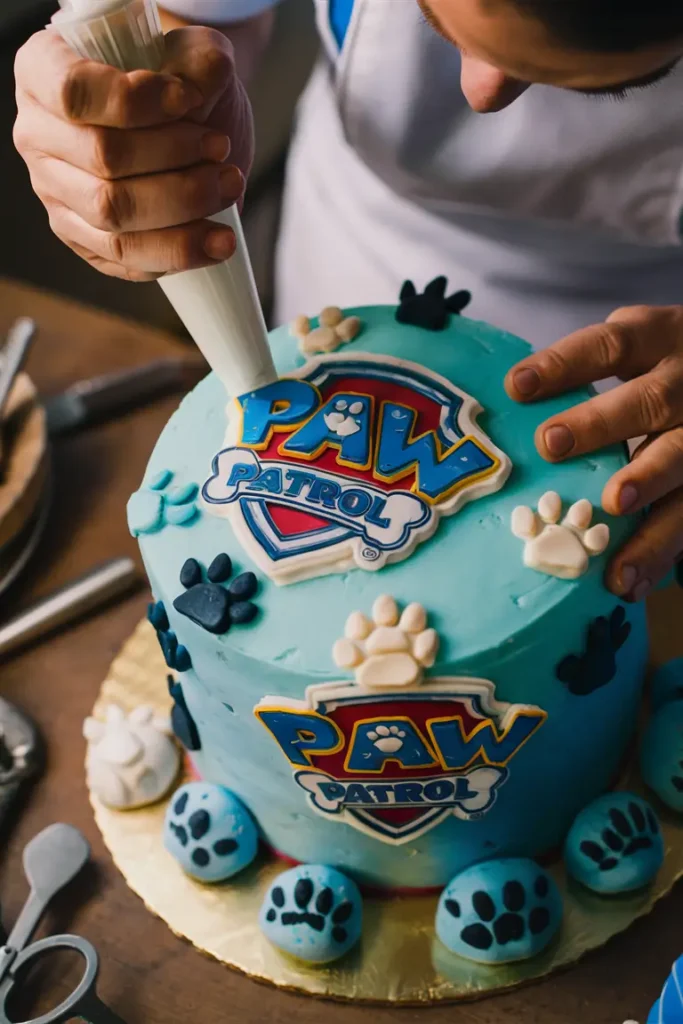
Step 6: Decorate with Fun Paw Patrol Character Faces
Now, let’s bring the characters to life with some detailed and adorable faces.
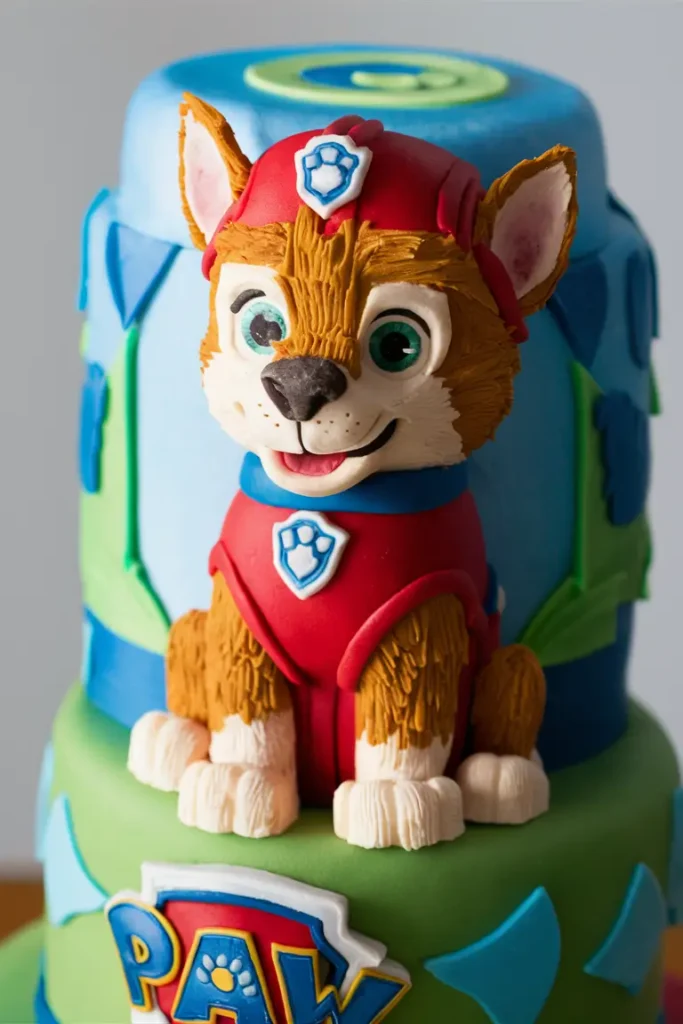
How to Make Edible Paw Patrol Character Faces
You can create character faces using fondant or modeling chocolate. Roll the fondant into small balls and flatten them for eyes, noses, and other features. Use edible markers to draw intricate details or pipe frosting for more realistic textures.
Simple Techniques to Create Character Details Using Fondant or Frosting
If you’re new to cake decorating, don’t worry. You can achieve a stunning look with simple fondant cutouts for eyes, ears, and accessories like hats. Alternatively, use a piping bag with fine tips to create detailed faces directly on the cake.
Step 7: Adding the Final Touches: Paw Prints and Logo Details
No Paw Patrol cake is complete without paw prints and the iconic logo.
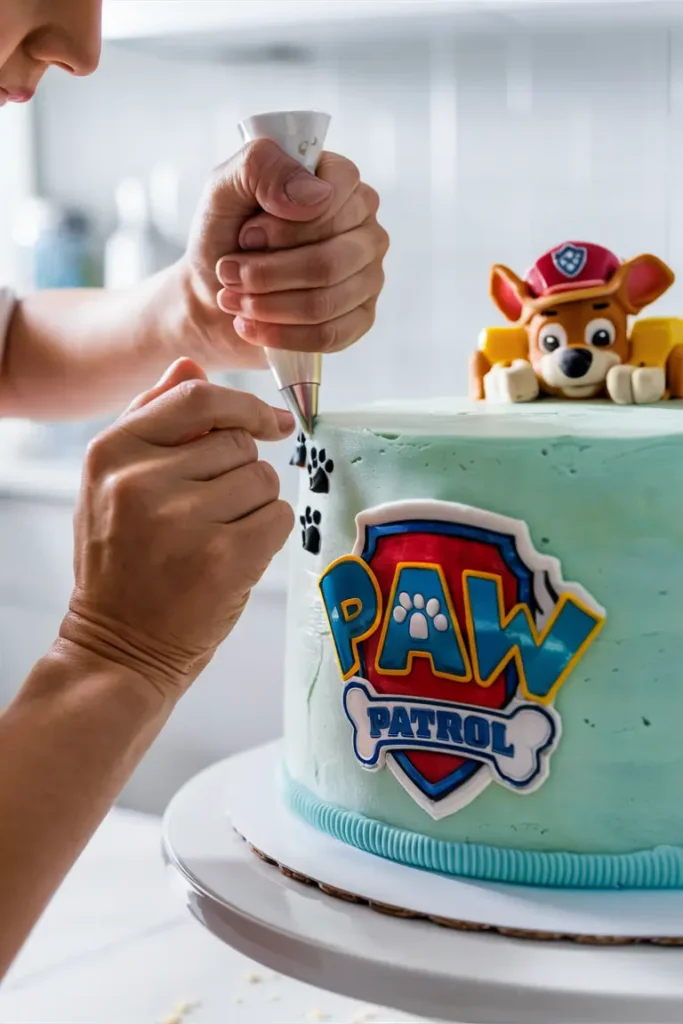
How to Add Paw Prints Around the Cake
Use a paw print stencil or freehand the design with piped frosting. This simple addition will tie your theme together and add a playful element.
Creating the Paw Patrol Logo to Complete the Look
The Paw Patrol logo can be recreated using fondant or colored frosting. If you’re feeling ambitious, make a detailed version, or keep it simple with a few bold colors.
Step 8: How to Add Personalization to Your Cake
Make the cake even more special with a personalized touch that celebrates your child’s milestone.
Incorporating Your Child’s Name and Age into the Design
You can write your child’s name and age using piped frosting or fondant. Consider placing this detail on the top or sides of the cake for a balanced, festive effect.
Adding Fun Elements Like Balloons or Candles
To enhance the birthday celebration feel, add fun elements like themed balloons or vibrant candles. These details create an atmosphere of excitement and make the cake even more eye-catching.
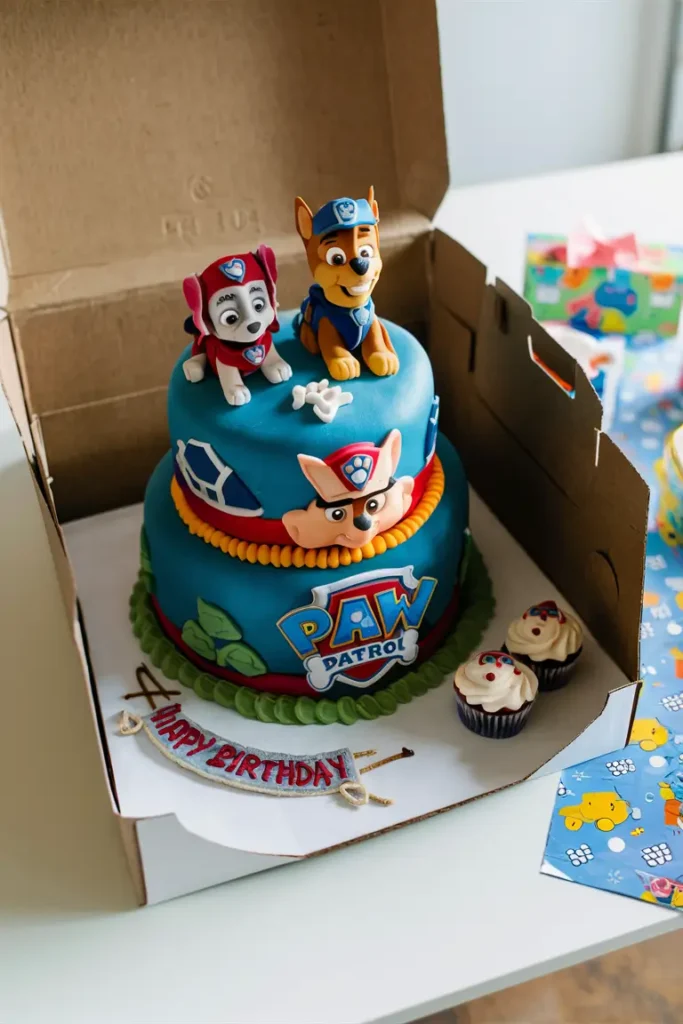
Step 9: Cake Storage and Transport: Keeping Your Paw Patrol Cake Fresh
After all your hard work, you’ll want to make sure your cake stays fresh and in one piece as you transport it to the party.
How to Store Your Cake Overnight Without Losing Shape
To store your cake overnight, keep it in a cool, dry place, covered lightly with plastic wrap or in an airtight cake box. If you’re making it ahead of time, refrigerating the cake will help set the frosting and maintain its shape.
Tips for Transporting the Cake Safely to the Party
When transporting your cake, ensure it’s placed on a flat surface inside a sturdy box. For longer distances, consider using cake boards and cake boxes specifically designed for safe travel.
Step 10: Cutting and Serving: Enjoying Your Homemade Paw Patrol Cake
The final step is the most rewarding—slicing into your beautiful cake and sharing it with friends and family.
How to Cut the Cake for a Picture-Perfect Presentation
To achieve the perfect slice, use a serrated knife to gently cut through the layers. If the cake has fondant or thick frosting, run the knife under hot water to ensure clean cuts.
Serving Suggestions and Cake Pairing Ideas
Pair your Paw Patrol cake with fun-themed snacks or drinks like cupcakes, cookies, or colorful punch to complement the birthday festivities.
Conclusion: Your Easy and Fun Paw Patrol Cake Is Ready to Wow the Party!
With a little creativity, you’ve turned a simple idea into a memorable, delightful masterpiece. This Paw Patrol cake isn’t just a treat—it’s a celebration in itself. The best part is, once you’ve mastered the basics, you can create even more personalized and unique cakes for future birthdays. Keep experimenting with different flavors, decorations, and designs to keep the cake-making adventure alive!
Final Thoughts on Making a Paw Patrol Cake at Home
Baking and decorating a Paw Patrol cake at home doesn’t have to be intimidating. With the right tools, some patience, and a little creativity, you’ll have a cake that’s as fun and vibrant as the show itself. You can always expand your repertoire, creating new cakes that reflect your child’s ever-changing favorite characters.
Tips for Future Birthday Cakes and Variations
As your child’s interests evolve, so can your cake designs. Whether it’s a different Paw Patrol character, a new theme, or even a different style of cake, there are endless possibilities for future celebrations. Keep exploring and having fun with each new cake adventure!
FAQ
Q: How do I get the Paw Patrol characters on the cake?
A: You can use edible fondant, cake toppers, or even edible images from your local bakery. For DIY fans, you can pipe frosting to create simple character faces!
Q: Can I make this cake ahead of time?
A: Absolutely! You can bake the cake layers a day or two in advance, store them in an airtight container, and frost it just before the party.
Q: Do I need any special tools to make this cake?
A: The basics like mixing bowls, piping bags, and cake pans are essential, but other than that, the tools are pretty straightforward. Just make sure to have some creativity on hand!
Q: What are some flavor options for the cake?
A: Vanilla, chocolate, or funfetti work great, but you can always get creative with other flavors that your child loves—strawberry, banana, or even marble!